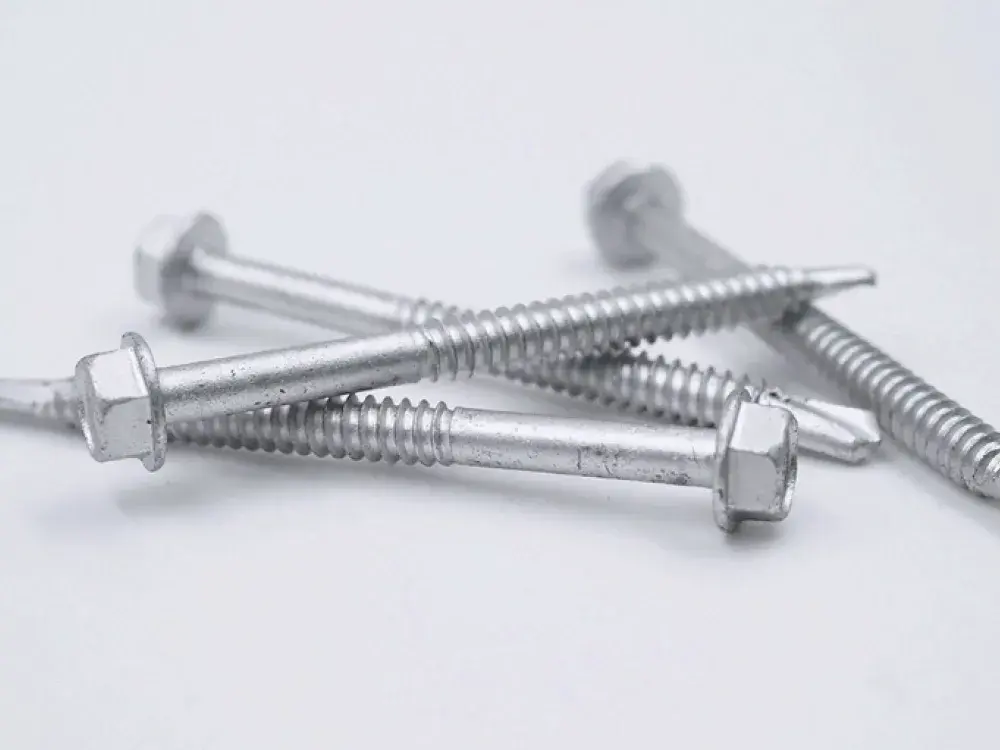
\u003C/p>\u003Cp>Celebrated for their robustness and efficient installation, \u003Ca href=\"https://www.fastenersystems.com/p/self-drilling-fasteners/1-4-14-self-drilling-hex-washer-head-carbon-steel/2129\">1/4-14 Self-Drilling Hex Washer Head Carbon Steel Screws\u003C/a> are a top choice for securing metal panels that provide unparalleled durability even in extreme conditions.\u003C/p>\u003Ch3>\u003Cstrong>10-16 Self-Drilling Hex Washer Head Carbon Steel Screws\u003C/strong>\u003C/h3>\u003Cp>\u003Cimg src=\"https://lh7-rt.googleusercontent.com/docsz/AD_4nXcTQHTmO3FDeneah8_Ey76p2nrhALx2yB4jCRPVUSzpx-LULRMLezzIE427W2ScjNVH1Luodfspw_Yj2JOv0al6EmOezK0ByBP4vBFJx0HNmta6SS_bHic6Ecj-P34eEo6citYEoQn9GdmjS7kToTBraoMo?key=4tDUsldWrlVE13tPR2Gy_Q\" alt=\"\" width=\"384\" height=\"339\" />\u003C/p>\u003Cp>These precision-engineered \u003Ca href=\"https://www.fastenersystems.com/p/self-drilling-fasteners/10-16-self-drilling-hex-washer-head-carbon-steel/2131\">10-16 Self-Drilling Hex Washer Head Carbon Steel Screws\u003C/a> are known for their exceptional grip, and will ensure a secure, enduring bond that's ideal for detailed tasks that require precise fastening.\u003C/p>\u003Ch2>Additional Considerations for Selecting the Best Screws for Metal Roofs.\u003C/h2>\u003Cp>Choosing the best metal screw isn’t just based on the metal roof type; it’s also based on installation practices and maintenance requirements.\u003C/p>\u003Ch2>Metal Roofing Installation\u003C/h2>\u003Cp>Achieving a flawless metal roofing installation requires adherence to several best practices to ensure durability, waterproofing, and structural integrity. Here’s a deeper dive into the essentials:\u003C/p>\u003Ch3>\u003Cstrong>Alignment and Perpendicular Placement\u003C/strong>\u003C/h3>\u003Cp>It's crucial that metal roof screws are positioned perfectly perpendicular to the roofing surface. This ensures maximum hold and prevents water ingress by maintaining the integrity of the washer seal.\u003C/p>\u003Ch3>\u003Cstrong>Correct Tightening\u003C/strong>\u003C/h3>\u003Cp>Avoid over-tightening metal screws, which can compromise the washer's seal and potentially warp the metal panel. A snug fit is what you're aiming for—tight enough to seal, but not so tight that it damages the materials.\u003C/p>\u003Ch3>\u003Cstrong>Regular Inspections and Maintenance\u003C/strong>\u003C/h3>\u003Cp>Conduct thorough inspections periodically, especially after extreme weather conditions. Look for signs of wear, such as rust or loosening. Replacing damaged or worn metal roof screws promptly is key to maintaining the roof’s structural integrity and waterproofing capabilities.\u003C/p>\u003Ch3>\u003Cstrong>Use of Appropriate Tools\u003C/strong>\u003C/h3>\u003Cp>Employing the right tools, like a torque-controlled drill, can help ensure screws are installed with the correct amount of force in order to prevent common issues like over-tightening or stripping.\u003C/p>\u003Ch3>\u003Cstrong>Sealing and Waterproofing\u003C/strong>\u003C/h3>\u003Cp>In some cases, additional sealing around the screw may be necessary, especially in areas prone to heavy rainfall or snow. Use appropriate sealants that are compatible with your roofing materials.\u003C/p>\u003Cp>By integrating these practices into your installation process, you create a more secure, durable, and effective roofing system that can withstand environmental threats and stand the test of time.\u003C/p>\u003Ch2>Maintenance Tips for Durable Metal Roofs\u003C/h2>\u003Cp>Maintaining your metal roof's excellence through regular inspections. Look for loose or corroded screws and replace them promptly to prevent water ingress. These proactive measures not only extend the lifespan of your roof, they also maintain the quality of the metal roofing screws so that your project is a testament to quality construction.\u003C/p>\u003Ch2>Secure Your Projects with Precision: Explore Fastener Systems Metal Roofing Screws\u003C/h2>\u003Cp>\u003Cimg src=\"https://lh7-rt.googleusercontent.com/docsz/AD_4nXdfMYiZAzVSreECEFHqZu-Dq1RkHSfFat_t827MpwXQrG0CcuswEuT-vVwYmFrevHjMXihUaSlttZsnjJZ_vqNbu4qL3iKMl1DigWlvPbwxucAH70NIkEUAEd0trTehxZiswAMEJWgHgtbhRmNw_g7Jqz42?key=4tDUsldWrlVE13tPR2Gy_Q\" alt=\"\" width=\"624\" height=\"468\" />\u003C/p>\u003Cp>Discover the ultimate selection of metal roofing screws designed for unparalleled durability and efficiency with \u003Ca href=\"https://www.fastenersystems.com/\">Fastener Systems Inc\u003C/a>. For more detailed insights on choosing the right screws for your next project, explore our \u003Ca href=\"https://www.fastenersystems.com/blog/best-metal-roofing-screws\">comprehensive guides\u003C/a> and \u003Ca href=\"https://www.fastenersystems.com/products/\">product range\u003C/a>. Our commitment to quality will ensure that your roofing projects are built to last.\u003C/p>\u003Cp>\u003Ca href=\"https://www.fastenersystems.com/contact-us\">Contact us today\u003C/a> for more information!\u003C/p>","https://fsi.nyc3.cdn.digitaloceanspaces.com/blog/_transforms/_1000x750_crop_center-center_80_none/6071/1_2025-02-18-211441_semj.webp",[157],{"__typename":158,"id":159,"title":43,"slug":160,"uri":161},"blogCategories_default_Entry","74","fasteners","blog/category/fasteners",{"id":163,"status":148,"title":164,"slug":165,"uri":166,"postDate":167,"dateUpdated":168,"excerptText":169,"blogPostContent":170,"blogFeaturedImageUrl":171,"blogCategories":172},"3774","Secure Metal Roofs with Ease: Self Tapping Metal Roofing Screws","self-tapping-metal-roof-screws","blog/self-tapping-metal-roof-screws","January 26, 2024","May 15, 2024","The effectiveness of a metal roof depends on the fasteners used. Self tapping metal roofing screws are strong and easy to install, which makes them a great choice for professionals and DIY enthusiasts alike. Self tapping screws are known for their durability and efficiency, and they are essential for building a long-lasting metal roof that can withstand the elements.","\u003Cp>The effectiveness of a metal roof depends on the fasteners used. Self tapping metal roofing screws are strong and easy to install, which makes them a great choice for professionals and DIY enthusiasts alike. Self tapping screws are known for their durability and efficiency, and they are essential for building a long-lasting metal roof that can withstand the elements.\u003C/p>\u003Ch2>Understanding Self Tapping Metal Roofing Screws\u003C/h2>\u003Cp>\u003Ca href=\"https://www.fastenersystems.com/products/fasteners/self-tapping-piercing\">Self tapping screws\u003C/a>, a key innovation in metal roofing, are designed to simplify the installation process. Unlike traditional fasteners, they create their own threading as they penetrate the roofing material which eliminates the need for pre-drilling holes.\u003C/p>\u003Cp>\u003Cimg src=\"https://lh7-us.googleusercontent.com/iQS24zw62sLdZHb0XQ646OTM-dHKO8U3ggNTgIuxuWkS2irGva4m_4jDN-25I4LFBk-_BrHuuvJ90OZK_ulgh1wCiJoSVAPKe3KGPUjCuA_pjIJbVrLDgoUTuOF9V9iMFi5bvFILoCUAu5yANeiE8W4\" width=\"624\" height=\"349\" alt=\"\" />\u003C/p>\u003Cp>With a sharp, drill bit-like tip, they effortlessly pierce through metal to ensure a secure and tight fit. This is especially important in areas with challenging weather conditions, where strong and reliable fastening solutions are required.\u003C/p>\u003Ch2>Key Features of Self Tapping Screws\u003C/h2>\u003Cp>Self tapping screws are essential in metal roofing due to their versatility and adaptability. They are designed to work with various roofing materials, and come in different sizes and types to meet the unique requirements of different projects. \u003C/p>\u003Cp>Whether it's a residential home or a commercial building, there is an ideal self tapping screw for every application. With their ability to adapt to different metal types and specialized designs, they are widely used in the roofing industry.\u003C/p>\u003Ch2>Types of Metal Roofing Screws\u003C/h2>\u003Ch3>\u003Cstrong>Exposed Fastener Screws\u003C/strong>\u003C/h3>\u003Cp>Exposed fastener screws are commonly used in many roofing projects. Their design allows them to attach panels directly to the roof structure and leave the screw heads visible. While this might affect the aesthetic appeal for some, it offers a straightforward and effective means of securing metal panels. They are especially suitable for corrugated and ribbed metal panels, where the strength of the attachment is critical.\u003C/p>\u003Ch3>\u003Cstrong>Concealed Fastener Screws\u003C/strong>\u003C/h3>\u003Cp>For projects where aesthetics are as important as functionality, concealed fastener screws are the go-to choice. Used primarily with standing seam metal roofs, they are used to attach roofing clips to the substrate and are hidden beneath the metal panels. The result is a clean, uninterrupted surface that appeals to modern design sensibilities.\u003C/p>\u003Ch3>\u003Cstrong>Self Drilling Screws\u003C/strong>\u003C/h3>\u003Cp>\u003Cimg src=\"https://lh7-us.googleusercontent.com/8TgT4EiLmXbaEyjthm2aPqG7swtAhIcT0IgDYWuk2qgj1pW9i5Gv_Q2-hcoPzB11x23kjA3ohOQnRrmq9cv_h1vjFKixGQK12JkkxhoJTK_LBLpcPxYVpkKE3O_lFdPwGnv2tLlHJjZJKif6aThnrKA\" width=\"624\" height=\"349\" alt=\"\" />\u003C/p>\u003Cp>\u003Ca href=\"https://www.fastenersystems.com/products/fasteners/self-drilling\">Self drilling screws\u003C/a> represent an innovation in fastening technology. Their drill bit-like tip, which allows them to pierce through metal without the need for a pre-drilled hole, makes them an efficient option for fastening metal panels to metal framing. This feature not only saves time, it also reduces labor costs.\u003C/p>\u003Ch3>\u003Cstrong>Wood-to-Metal Screws\u003C/strong>\u003C/h3>\u003Cp>When attaching metal panels to wooden structures, wood-to-metal screws are ideal. Their design includes a sharp, aggressive thread that penetrates both wood and metal without causing damage to the wooden structure. This ensures a firm and lasting bond between the metal panels and the wood substrate.\u003C/p>\u003Ch2>Factors to Consider When Choosing Metal Roofing Screws\u003C/h2>\u003Cp>Selecting the right screws requires considering material compatibility to prevent corrosion, the corrosion resistance of the screws, the appropriate length for secure fastening, and washer quality for a watertight seal.\u003C/p>\u003Ch2>6 Installation Tips for Metal Roofing Screws\u003C/h2>\u003Cp>Properly installing metal roofing screws is crucial for ensuring the roof's longevity and effectiveness:\u003C/p>\u003Cp>1. The first step is selecting the right screw type based on the specific metal roofing system.\u003C/p>\u003Cp>2. During installation, it's important to drive the screws straight and perpendicular to the panel to ensure proper engagement with the substrate and a secure fit. The decision to pre-drill may vary depending on the roofing material and screw type.\u003C/p>\u003Cp>3. Exposed and concealed fastener systems are both used to secure metal roof panels. The choice depends on specific project requirements by considering factors such as cost, appearance, and longevity.\u003C/p>\u003Cp>4, When installing ridge caps, longer screws are required to securely penetrate both the metal panels and the underlying structure.\u003C/p>\u003Cp>5. Attention to detail is crucial when installing gable and sidewall trim screws. These areas are susceptible to wind uplift and water infiltration. \u003C/p>\u003Cp>6. The proper placement of valley flashing screws is essential. Ensure at least a one-inch gap from the edge to promote effective water runoff.\u003C/p>\u003Ch2>Common Mistakes to Avoid in Metal Roofing Screw Installation\u003C/h2>\u003Cp>Installing metal roofing screws might seem straightforward, but common mistakes can compromise the roof's integrity.\u003C/p>\u003Cul>\u003Cli>Over-tightening and under-tightening screws can both lead to issues with the seal and holding power.\u003C/li>\u003Cli>Incorrect angles in screw placement can create potential leak points, while incorrect screw placement can lead to weakened structure and increased vulnerability to weather elements.\u003C/li>\u003Cli>Placing screws in the corrugated metal panels requires careful consideration; incorrect placement not only affects water flow, it also impacts the structural integrity of the roof.\u003C/li>\u003C/ul>\u003Ch2>Advantages of Standing Seam Metal Roofing Over Corrugated Metal Panels\u003C/h2>\u003Cp>Standing seam metal roofing, known for its concealed fasteners, provides significant advantages over traditional corrugated metal panels. The concealed fastener system not only provides a sleek and modern appearance, it also enhances protection against weather elements. This type of roofing minimizes the potential for leaks, as there are fewer points of penetration, which makes it a durable and long-lasting option.\u003C/p>\u003Ch2>Why Choose Screws Over Nails for Metal Roofing Installation?\u003C/h2>\u003Cp>When it comes to fastening metal roofs, screws are generally preferred for their superior holding power, ease of installation, and adjustability. Unlike nails, screws can be easily tightened or removed if needed in order to allow for corrections during and after installation. This flexibility, combined with the secure hold they provide, makes screws an ideal choice for metal roofing installations.\u003C/p>\u003Ch2>Shop the Best Self Tapping Metal Roofing Screws on the Market at Fastener Systems\u003C/h2>\u003Cp>At \u003Ca href=\"https://www.fastenersystems.com/\">Fastener Systems Inc. (FSI)\u003C/a>, we offer a diverse range of high-quality \u003Ca href=\"https://www.fastenersystems.com/products/fasteners/self-tapping-piercing\">self tapping metal roofing screws\u003C/a>. Our screws are engineered with superior holding power and ease of installation in mind, which makes them an ideal choice for your metal roofing installations. Whether your project involves corrugated panels, standing seam roofing, or attaching metal to wood, we have the perfect screw for your project! \u003C/p>\u003Cp>\u003Ca href=\"https://www.fastenersystems.com/contact-us\">Contact us today\u003C/a> for a fast quote on your next project!\u003C/p>","https://fsi.nyc3.cdn.digitaloceanspaces.com/blog/_transforms/_1000x750_crop_center-center_80_none/2918/64e90a801ac9d372b97be719_how-to-use-self-tapping-screws-2.webp",[173],{"__typename":158,"id":159,"title":43,"slug":160,"uri":161},{"id":175,"status":148,"title":176,"slug":177,"uri":178,"postDate":179,"dateUpdated":168,"excerptText":180,"blogPostContent":181,"blogFeaturedImageUrl":182,"blogCategories":183},"3772","Cracking the Code: Hex Nut Size Chart, Measurement, and Selection","hex-nut-sizes","blog/hex-nut-sizes","January 18, 2024","Choosing the right hex nut is crucial in construction and DIY projects. It impacts the integrity, functionality, and safety of assemblies and structures. Understanding dimensions, sizes, and types of hex nuts is vital. The correct size and material ensure a perfect fit and durability in different environments. This introduction highlights the importance of size and material considerations in hex nut selection.","\u003Cp>Choosing the right hex nut is crucial in construction and DIY projects. It impacts the integrity, functionality, and safety of assemblies and structures. Understanding dimensions, sizes, and types of hex nuts is vital. The correct size and material ensure a perfect fit and durability in different environments. This introduction highlights the importance of size and material considerations in hex nut selection.\u003C/p>\u003Ch2>The Comprehensive Guide to Hex Nut Sizes\u003C/h2>\u003Cp>Hex nuts come in a wide variety of sizes that are designed to accommodate different bolt sizes and strength requirements. \u003C/p>\u003Ch3>\u003Cstrong>Key Dimensions of Hex Nuts\u003C/strong>\u003C/h3>\u003Cp>Hex nuts are categorized by nominal thread diameter, width across flats, and thickness. These dimensions ensure a secure fit with corresponding bolts or screws which is essential for the structural integrity of the joint.\u003C/p>\u003Ch3>\u003Cstrong>Importance of Accurate Sizing\u003C/strong>\u003C/h3>\u003Cp>A hex nut size chart is an invaluable tool in this process, that aids in the selection of the right size for your specific needs. For instance, the width across flats is crucial for determining the correct wrench size for installation, and the thickness gives an insight into the nut's load-bearing capacity.\u003C/p>\u003Ch2>Navigating Hex Nut Sizes and Utilizing Size Charts\u003C/h2>\u003Ch3>\u003Cstrong>Understanding Size Variations\u003C/strong>\u003C/h3>\u003Cp>Hex nuts come in a diverse range of sizes, each tailored to meet different requirements and standards. To select the right hex nut for your project, it’s important to understand the key metrics that categorize these sizes:\u003C/p>\u003Ch4>\u003Cstrong>Nominal Thread Diameter\u003C/strong>\u003C/h4>\u003Cp>The Nominal Thread Diameter refers to the screw or bolt diameter that the nut is designed to fit. It's measured in millimeters or inches, depending on the standard. The diameter determines nut compatibility with a specific bolt or screw.\u003C/p>\u003Ch4>\u003Cstrong>Width Across Flats\u003C/strong>\u003C/h4>\u003Cp>The Width Across Flats is the distance between two opposite sides of the hex nut. This dimension is crucial as it determines the size of the wrench or socket used to tighten or loosen the nut.\u003C/p>\u003Ch4>\u003Cstrong>Thickness\u003C/strong>\u003C/h4>\u003Cp>The thickness of a hex nut is the measurement from one flat face to the opposite flat face. This dimension is particularly crucial as it directly influences the load-bearing capacity of the nut.\u003C/p>\u003Ch3>\u003Cstrong>Using Hex Nut Size Charts\u003C/strong>\u003C/h3>\u003Cp>Size charts are crucial tools in the selection process, and they are an easy way to compare various hex nut sizes and their dimensions.\u003C/p>\u003Ch4>\u003Cstrong>Metric vs. Standard Sizes\u003C/strong>\u003C/h4>\u003Cp>Hex nuts are available in both metric and standard (Imperial) measurements:\u003C/p>\u003Cul>\u003Cli>Metric Sizes: Common sizes include M6, M8, and M10.\u003C/li>\u003Cli>Standard (Imperial) Sizes: Frequently used sizes are 1/4\", 3/8\", and 1/2\".\u003C/li>\u003C/ul>\u003Cp>The choice between metric and standard sizes should be based on your project's specific needs and prevailing regional or industry standards.\u003C/p>\u003Ch2>Sample Hex Nut Size Chart\u003C/h2>\u003Cp>\u003Cimg src=\"https://lh7-us.googleusercontent.com/uaOXQm9DiNViq4zJ4glAys4CTkrbHk2wAQGXvmTaCSku7u26EIPAntnjxyPMlx9Z3cutmAsvDzdpZbZnZdINH-atxA06zrWYMUQKhjA5DU7YaGYmrW3HMaq8CKGgfp5QDhtIKAXdwyzex5HIUdJcw38\" width=\"624\" height=\"468\" alt=\"\" />\u003C/p>\u003Cp>Choosing the right size and material for a hex nut is crucial to ensure a proper fit with bolts or screws. It also affects usability and durability in different environments. By making the correct choices, you can ensure stability and longevity in your construction or DIY project. Remember to align the hex nut with the project requirements and corresponding fasteners.\u003C/p>\u003Ch2>Material Considerations for Hex Nut Selection\u003C/h2>\u003Cp>The material of a hex nut significantly influences its suitability for various applications:\u003C/p>\u003Cul>\u003Cli>Materials like stainless steel, known for their corrosion resistance, are ideal for outdoor or marine environments.\u003C/li>\u003Cli>Carbon steel, valued for its strength, is typically used in high-load applications.\u003C/li>\u003Cli>Brass and aluminum, each with unique properties like corrosion resistance and lightweight, cater to specific needs like electrical conductivity or aerospace applications.\u003C/li>\u003C/ul>\u003Cp>The choice of material should align with the environmental conditions and the mechanical demands of the project.\u003C/p>\u003Ch2>Types of Hex Nuts\u003C/h2>\u003Cp>Understanding the different types of hex nuts is crucial for making informed decisions about their use in various applications. Each type has unique characteristics and is designed for specific purposes:\u003C/p>\u003Ch3>\u003Cstrong>Finished Hex Nuts\u003C/strong>\u003C/h3>\u003Cp>These are the standard hex nuts used in most applications. They offer a good balance of strength and versatility, and are suitable for general use in construction and machinery.\u003C/p>\u003Ch3>\u003Cstrong>Heavy Hex Nuts\u003C/strong>\u003C/h3>\u003Cp>Larger and thicker than standard hex nuts, heavy hex nuts are designed for applications that require a stronger, more robust connection. They are often used in construction projects, particularly where structural strength is a priority.\u003C/p>\u003Ch3>\u003Cstrong>Nylon Insert Lock Nuts\u003C/strong>\u003C/h3>\u003Cp>These nuts have a nylon insert that grips the bolt threads to provide a locking feature. This prevents the nut from loosening under vibration or movement, which makes them ideal for applications where stability is crucial.\u003C/p>\u003Ch3>\u003Cstrong>Jam Nuts\u003C/strong>\u003C/h3>\u003Cp>Thinner than standard hex nuts, jam nuts are typically used as a type of locknut, where they are \"jammed\" up against a standard nut to lock the two in place. They are useful in situations where space is limited or where a low-profile nut is needed.\u003C/p>\u003Ch3>\u003Cstrong>Flange Nuts\u003C/strong>\u003C/h3>\u003Cp>Equipped with a wide flange at one end, flange nuts act as an integrated, non-spinning washer. This distributes the pressure over a larger area, which is ideal for applications where the surface material is softer, like wood or plastic.\u003C/p>\u003Ch3>\u003Cstrong>Coupling Nuts\u003C/strong>\u003C/h3>\u003Cp>Coupling nuts are long, cylindrical nuts used to connect two pieces of threaded rod or other male threaded fasteners, which makes them suitable for applications that require a strong, extended length connection.\u003C/p>\u003Cp>Each type of hex nut serves a distinct purpose and choosing the right one depends on the specific requirements of your project. Consider factors such as the application environment, the type of load the connection will bear, and whether the assembly will be subject to vibration or movement.\u003C/p>\u003Ch2>Essential Tips for Selecting the Right Hex Nut\u003C/h2>\u003Cp>Selecting the right hex nut for your project involves more than just matching sizes. You need to consider the material of the nut, which should be compatible with the bolt material to prevent corrosion. The environment in which the nut will be used also plays a role – outdoor applications may require corrosion-resistant materials like stainless steel.\u003C/p>\u003Ch3>\u003Cstrong>Matching Hex Nut and Bolt Materials\u003C/strong>\u003C/h3>\u003Cp>Ensuring compatibility between the hex nut and bolt materials is a critical factor in any assembly. When these two components are made from different metals, a phenomenon known as galvanic corrosion can occur, which may cause the connection to weaken over time. This means, for instance, if you're using a stainless steel bolt, it's typically best to match it with a stainless steel hex nut.\u003C/p>\u003Cp>Likewise, a carbon steel bolt pairs well with a carbon steel hex nut. Prioritizing material compatibility helps maintain the integrity of the connection and increases the lifespan of your project.\u003C/p>\u003Ch2>Avoiding Common Measurement Errors: Best Practices\u003C/h2>\u003Cp>Accurate measurement is vital in selecting the right hex nut. Mistakes in measurement can lead to loose connections that can compromise the integrity of the entire structure. Use precise tools like calipers for measurement and always double-check your readings against the size chart.\u003C/p>\u003Ch2>Explore a Wide Range of High-Performance Hex Nuts at Fastener Systems\u003C/h2>\u003Cp>At \u003Ca href=\"https://www.fastenersystems.com/\">Fastener Systems Inc. (FSI)\u003C/a>, we offer a wide range of high-quality hex nuts for various applications. Each hex nut is carefully engineered to ensure a perfect fit, superior strength, and reliable performance. We also carry a full line of screws, bolts and other fasteners, as well as caulks, tape and tools. \u003C/p>\u003Cp>\u003Ca href=\"https://www.fastenersystems.com/contact-us\">Contact us today\u003C/a> for more information!\u003C/p>","https://fsi.nyc3.cdn.digitaloceanspaces.com/blog/_transforms/_1000x750_crop_center-center_80_none/2942/64cbfeef3475bf6febd77f59_How-to-Correctly-Use-Washers-with-Screws-2.webp",[184],{"__typename":158,"id":159,"title":43,"slug":160,"uri":161},{"id":186,"status":148,"title":187,"slug":188,"uri":189,"postDate":190,"dateUpdated":168,"excerptText":191,"blogPostContent":192,"blogFeaturedImageUrl":193,"blogCategories":194},"3770","Galvanized vs. Stainless Steel Bolts: Choosing the Right Option","galvanized-vs-stainless-steel-bolts","blog/galvanized-vs-stainless-steel-bolts","January 12, 2024","Choosing the right bolt for your application can be complex. Factors like environmental conditions, load-bearing capacity, and cost are important. This article compares galvanized and stainless steel bolts, and discusses their properties, practical considerations, application tips, and environmental impact.","\u003Cp>Choosing the right bolt for your application can be complex. Factors like environmental conditions, load-bearing capacity, and cost are important. This article compares galvanized and stainless steel bolts, and discusses their properties, practical considerations, application tips, and environmental impact. \u003C/p>\u003Cp>Ever wondered why some bolts withstand harsh marine environments while others are perfect for your backyard project? Let's dive into the world of galvanized and stainless steel bolts to find out.\u003C/p>\u003Ch2>Understanding the Basics\u003C/h2>\u003Ch3>\u003Cstrong>What is Stainless Steel?\u003C/strong>\u003C/h3>\u003Cp>Stainless steel is made up of iron and at least 10% chromium, which gives it excellent resistance to rust and corrosion. It comes in different grades:\u003C/p>\u003Cul>\u003Cli>18-8: Contains 18% chromium and 8% nickel, which is suitable for general purposes and food processing.\u003C/li>\u003Cli>316: A mix of 16-18% chromium, 10-14% nickel, and 2-3% molybdenum, which is ideal for marine, chemical, and food processing industries.\u003C/li>\u003Cli>410: Made of 11.5-13.5% chromium, it's used in high-stress applications and heat treatment.\u003C/li>\u003C/ul>\u003Ch3>\u003Cstrong>What is Galvanized Steel?\u003C/strong>\u003C/h3>\u003Cp>Galvanized steel is steel that is coated in a protective layer of zinc. The galvanization process helps protect the steel from rust and makes it suitable for a variety of applications, especially in environments where corrosion resistance is crucial.\u003C/p>\u003Ch2>Comparative Analysis of Galvanized vs. Stainless Steel Bolts\u003C/h2>\u003Cp>When choosing the right bolts for your project, understanding how galvanized and stainless steel differ in key areas is crucial. Here's a side-by-side comparison:\u003C/p>\u003Ch3>\u003Cstrong>Corrosion Resistance\u003C/strong>\u003C/h3>\u003Cp>\u003Cstrong>Stainless Steel\u003C/strong>: Known for its superior corrosion resistance, stainless steel is particularly effective in environments with moisture and corrosive elements. This is due to its chromium content, which forms a protective layer against rust.\u003C/p>\u003Cp>\u003Cstrong>Galvanized Steel\u003C/strong>: Offers good corrosion resistance through its zinc coating. However, this protection can be compromised in wet conditions that expose the steel to rust.\u003C/p>\u003Ch3>\u003Cstrong>Strength and Durability\u003C/strong>\u003C/h3>\u003Cp>\u003Cstrong>Stainless Steel\u003C/strong>: Boasts higher tensile strength and load-bearing capacity that make it suitable for demanding applications. This strength comes from its unique alloy composition, including iron and chromium.\u003C/p>\u003Cp>\u003Cstrong>Galvanized Steel\u003C/strong>: Also strong and durable, but generally has a lower tensile strength compared to stainless steel. The galvanization process enhances the strength of the base steel, but it may not be enough for high-stress applications.\u003C/p>\u003Ch3>\u003Cstrong>Aesthetic and Practical Considerations\u003C/strong>\u003C/h3>\u003Cp>\u003Cstrong>Stainless Steel\u003C/strong>: Offers a polished and refined appearance that makes it a preferred choice for visible applications where aesthetics are important, such as in architectural or decorative uses.\u003C/p>\u003Cp>\u003Cstrong>Galvanized Steel\u003C/strong>: Has a more utilitarian look. It's often selected for its functional qualities in applications where the appearance is secondary, like in certain industrial or outdoor settings.\u003C/p>\u003Cp>Each type of bolt has its unique advantages and is suitable for different applications. The choice between them should be based on the specific requirements of your project, including environmental exposure, strength needs, and visual preferences.\u003C/p>\u003Ch2>Comprehensive Considerations for Bolt Selection\u003C/h2>\u003Cp>After understanding the basic properties and direct comparison of galvanized and stainless steel bolts, it’s important to contextualize these features within your project's specific needs. Here are the key factors integrated into the decision-making process:\u003C/p>\u003Ch3>\u003Cstrong>Project Requirements and Environmental Conditions\u003C/strong>\u003C/h3>\u003Cp>For projects in moist or corrosive environments, stainless steel's corrosion resistance makes it the superior choice.\u003C/p>\u003Cp>In drier settings where corrosion is less of a concern, galvanized steel can be an effective and economical option.\u003C/p>\u003Ch3>\u003Cstrong>Budget and Cost-Effectiveness\u003C/strong>\u003C/h3>\u003Cp>While galvanized steel bolts are often more affordable upfront, consider the potential long-term maintenance and replacement costs, especially in corrosive environments.\u003C/p>\u003Cp>Stainless steel bolts, though initially more expensive, can provide long-term cost savings due to their durability and lesser need for replacement.\u003C/p>\u003Ch3>\u003Cstrong>Load-Bearing Capacity and Application\u003C/strong>\u003C/h3>\u003Cp>Stainless steel’s higher tensile strength makes it ideal for high-load applications and situations demanding robust performance.\u003C/p>\u003Cp>Galvanized steel, while also strong, is better suited for applications where extreme strength isn’t a critical factor.\u003C/p>\u003Ch2>Installation and Usage Tips\u003C/h2>\u003Ch3>\u003Cstrong>Compatibility and Galvanic Corrosion\u003C/strong>\u003C/h3>\u003Cp>Be mindful of mixing different metals. Combining galvanized and stainless steel can lead to galvanic corrosion, so it's crucial to use compatible materials in your project.\u003C/p>\u003Ch3>\u003Cstrong>Best Practices for Installation\u003C/strong>\u003C/h3>\u003Cp>Always adhere to manufacturer guidelines for both types of bolts to ensure optimal performance and longevity. Proper installation is key to the effectiveness of the fasteners.\u003C/p>\u003Ch3>\u003Cstrong>Ductility and Weldability Considerations\u003C/strong>\u003C/h3>\u003Cp>In addition to the previously discussed factors, ductility and weldability are important considerations when choosing between galvanized and stainless steel bolts. \u003C/p>\u003Cp>Galvanized steel typically offers greater malleability, which makes it easier to shape and work with compared to stainless steel. This can be an important factor in projects that require an intricate or precise shaping of materials.\u003C/p>\u003Cp>Regarding weldability, both materials are weldable but come with unique considerations.\u003C/p>\u003Cp>Welding stainless steel requires careful temperature control to avoid degrading its corrosion-resistant layer, which can impact the material's integrity. \u003C/p>\u003Cp>On the other hand, welding galvanized steel necessitates adequate ventilation due to the fumes produced, and the protective zinc layer can be compromised at the weld, and potentially require reapplication.\u003C/p>\u003Cp>Understanding these aspects helps to ensure that the right selection is made based on the specific requirements of fabrication and application in your project.\u003C/p>\u003Ch2>Environmental and Sustainability Considerations\u003C/h2>\u003Cp>The environmental impact of construction materials is a major concern for both galvanized and stainless steel bolts. It is crucial to consider their unique environmental footprints.\u003C/p>\u003Ch3>\u003Cstrong>Galvanized Steel Bolts\u003C/strong>\u003C/h3>\u003Ch4>\u003Cstrong>Zinc Runoff\u003C/strong>\u003C/h4>\u003Cp>Galvanized bolts can release zinc into the environment, particularly in outdoor settings. Zinc runoff can have ecological impacts, such as affecting soil and water quality, which in turn can influence plant growth and aquatic life.\u003C/p>\u003Ch4>\u003Cstrong>Manufacturing Process\u003C/strong>\u003C/h4>\u003Cp>The production process of galvanizing steel involves energy-intensive activities and the use of chemicals, which contribute to its environmental impact.\u003C/p>\u003Ch3>\u003Cstrong>Stainless Steel Bolts\u003C/strong>\u003C/h3>\u003Ch4>\u003Cstrong>Recyclability\u003C/strong>\u003C/h4>\u003Cp>Stainless steel is highly recyclable, which enhances its sustainability. The ability to reclaim and reuse this material reduces the need for new raw materials and minimizes environmental impact.\u003C/p>\u003Ch4>\u003Cstrong>Longevity\u003C/strong>\u003C/h4>\u003Cp>The durability of stainless steel means less frequent replacement, to help reduce waste and the need for additional manufacturing over time.\u003C/p>\u003Ch3>\u003Cstrong>Making an Environmentally Conscious Choice\u003C/strong>\u003C/h3>\u003Cp>When selecting bolts for a project, consider the long-term environmental implications of your choice.\u003C/p>\u003Cp>Stainless steel, with its recyclability and longevity, often presents a more sustainable option, especially in projects where environmental considerations are a priority.\u003C/p>\u003Ch2>Choose Fastener Systems for All of Your Bolt Needs\u003C/h2>\u003Cp>In choosing between galvanized and stainless steel bolts, consider the specific needs of your project. For quality, reliability, and expert advice, turn to \u003Ca href=\"https://www.fastenersystems.com/\">Fastener Systems Inc. (FSI)\u003C/a>. We offer a wide selection of both types to ensure you find the perfect match for any application. Trust us for your \u003Ca href=\"https://www.fastenersystems.com/products/fasteners\">fastening solutions\u003C/a> and ensure the success of your project with the right bolts.\u003C/p>\u003Cp>\u003Ca href=\"https://www.fastenersystems.com/contact-us\">Contact us today\u003C/a> for a fast quote on your next project!\u003C/p>","https://fsi.nyc3.cdn.digitaloceanspaces.com/blog/_transforms/_1000x750_crop_center-center_80_none/2949/64cbfaf2dd4dc24767de8aac_Carriage-Bolt-vs.-Hex-Bolt-1.webp",[195],{"__typename":158,"id":159,"title":43,"slug":160,"uri":161},{"id":197,"status":148,"title":198,"slug":199,"uri":200,"postDate":201,"dateUpdated":168,"excerptText":202,"blogPostContent":203,"blogFeaturedImageUrl":204,"blogCategories":205},"3768","Decoding Blind Rivet Sizes: Your Comprehensive Dimensions Guide","blind-rivet-sizes","blog/blind-rivet-sizes","January 4, 2024","Blind rivets, also known as pop rivets, are crucial tools for professionals and DIY enthusiasts alike. They offer a simple and reliable solution for joining materials in various applications. This guide not only explains how to choose the right rivet, it also offers insights into the correct installation techniques.","\u003Cp>Blind rivets, also known as pop rivets, are crucial tools for professionals and DIY enthusiasts alike. They offer a simple and reliable solution for joining materials in various applications. This guide not only explains how to choose the right rivet, it also offers insights into the correct installation techniques.\u003C/p>\u003Ch2>Simplified Guide to Rivet Materials and Size Codes\u003C/h2>\u003Cp>Selecting the right rivet involves understanding both the material and the size codes. Each code, such as ABL6-8A, is a shorthand for the rivet's specifications:\u003C/p>\u003Ch3>\u003Cstrong>Material (First Letter)\u003C/strong>\u003C/h3>\u003Cp>The code begins with a letter that specifies the rivet material—'A' for Aluminum, a lightweight and versatile choice, or 'S' for Stainless steel, known for its strength and corrosion resistance. The material should match your project's needs for durability and environmental conditions.\u003C/p>\u003Ch3>\u003Cstrong>Head Style (Second Letter)\u003C/strong>\u003C/h3>\u003Cp>The second letter, like 'B' for button head, identifies the head style. This choice depends on the desired balance between aesthetics and functionality.\u003C/p>\u003Ch3>\u003Cstrong>Body Diameter and Grip Length (Numbers)\u003C/strong>\u003C/h3>\u003Cp>The following numbers give the rivet’s body diameter and maximum grip length, respectively. These dimensions are crucial for ensuring the rivet fits the pre-drilled hole and can effectively clamp the materials together.\u003C/p>\u003Ch3>\u003Cstrong>Mandrel Material (Final Letter)\u003C/strong>\u003C/h3>\u003Cp>The last part of the code often matches the rivet body, and indicates the mandrel's material, which affects the rivet’s overall strength.\u003C/p>\u003Cp>This concise understanding of the size code will help you choose a rivet that's suitable in terms of material, size, and strength, to help ensure a robust and lasting joint for your project.\u003C/p>\u003Ch2>Sample Chart: Decoding Size Code for Blind Rivets\u003C/h2>\u003Cp>To illustrate how size codes translate into practical specifications, here's a sample chart for common blind rivets:\u003C/p>\u003Ch2>\u003Cimg src=\"https://lh7-us.googleusercontent.com/8CTccnan5tYUn4UWHxV0gDkYzuOucvV4RDXZGLItU4ZdkuMwlskhqa-GQ4bnrWkuiv3dDmNyzXkJOVHWvCE96D7ZapBfsRp3QVZTyTryDg2k_MoZfbGk0pAngCq6FRzbKPp9FE7xTJUrbl9zs_QEXjM\" width=\"624\" height=\"468\" alt=\"\" />\u003C/h2>\u003Ch2>Key Factors in Rivet Selection: Strength, Grip, and Head Design\u003C/h2>\u003Cp>Now that we've covered the basics of size codes, let's delve into the key factors that influence the selection of the right rivet: strength, grip range, and head design.\u003C/p>\u003Ch3>\u003Cstrong>Evaluating Rivet Joint Strength\u003C/strong>\u003C/h3>\u003Cp>Having decoded the size codes and materials of blind rivets, the next crucial step is to assess the strength of the joint they will form. The information gleaned from the size codes - particularly concerning the rivet's diameter and grip length - is directly linked to how well the rivet can sustain loads and stresses. These dimensions are not just measurements; they are indicators of the rivet's capacity to create a strong, enduring joint in your project.\u003C/p>\u003Ch4>\u003Cstrong>Influence of Diameter\u003C/strong>\u003C/h4>\u003Cp>The diameter of a rivet directly impacts its ability to bear loads. Larger diameter rivets offer more surface area in contact with the material in order to distribute stress more effectively and to create a stronger bond. Conversely, smaller diameter rivets are suitable for lighter applications where less stress is exerted.\u003C/p>\u003Ch4>\u003Cstrong>Role of Grip Length\u003C/strong>\u003C/h4>\u003Cp>The grip length, indicated by the second number in the size code, determines how well the rivet can handle the thickness of the materials being joined. A correctly chosen grip length ensures that the rivet can effectively clamp the workpieces together to provide sufficient tensile strength. Rivets with a grip length too short may not form a secure bond, while those too long could lead to improper installation and weakened joints.\u003C/p>\u003Cp>Understanding how the diameter and grip length affect joint strength is essential for selecting the right rivet. This ensures that the rivet can withstand the intended load and stress to maintain the integrity and longevity of the joint in various applications.\u003C/p>\u003Ch3>\u003Cstrong>Grip Range and Material Thickness\u003C/strong>\u003C/h3>\u003Ch4>\u003Cstrong>Understanding Grip Range\u003C/strong>\u003C/h4>\u003Cp>The grip range of a rivet refers to the range of material thicknesses that the rivet can securely fasten. Each rivet size is designed with a specific minimum and maximum grip range. Select a rivet whose grip range encompasses the total thickness of the materials you are joining. A rivet with a suitable grip range ensures optimal expansion and a strong joint. An incorrect grip range might result in a weak bond or an over-expanded rivet that can lead to joint failure.\u003C/p>\u003Ch4>\u003Cstrong>Measuring Material Thickness\u003C/strong>\u003C/h4>\u003Cp>Accurately determining the combined thickness of the materials to be joined is crucial. The rivet's grip length should be equal to or slightly greater than the total material thickness. This alignment guarantees that the rivet can create a firm and lasting joint without protruding unnecessarily or failing to engage the materials fully.\u003C/p>\u003Cp>This section highlights the importance of carefully matching the rivet's specifications to the physical characteristics of the materials being joined. By doing so, you ensure a secure and durable fastening, which is essential for the integrity and longevity of your project.\u003C/p>\u003Ch3>\u003Cstrong>Head Shape and Size\u003C/strong>\u003C/h3>\u003Cp>The head shape and size of a blind rivet are critical aspects to consider when selecting the right rivet for your project. Three common head styles are the dome head, countersunk head, and large flange head:\u003C/p>\u003Cul>\u003Cli>Dome heads are the most common, and have a low profile and sufficient bearing surface.\u003C/li>\u003Cli>Countersunk heads, on the other hand, are ideal for applications that require a flush surface.\u003C/li>\u003Cli>Large flange heads offer an increased bearing surface for softer or brittle materials.\u003C/li>\u003C/ul>\u003Cp>The size of the rivet head should be chosen based on the load it needs to bear and the material it will be applied to. Remember, a larger head provides a wider surface area and can spread load over a larger area, thereby reducing the chance of material pull-through.\u003C/p>\u003Ch2>Installation Insights\u003C/h2>\u003Cp>Proper installation is crucial for the effectiveness of blind rivets. Ensure your workpieces are prepared and that you have the correct tools for the job.\u003C/p>\u003Ch3>\u003Cstrong>Step-by-Step Guide\u003C/strong>\u003C/h3>\u003Col>\u003Cli>\u003Cstrong>Prepare the Materials\u003C/strong>: Begin by ensuring your workpieces are clean, deburred, and aligned correctly. The holes should be pre-drilled and must match the size of the rivet to be used.\u003C/li>\u003Cli>\u003Cstrong>Insert the Rivet\u003C/strong>: Place the rivet in your rivet tool and make sure that the rivet's mandrel is fully engaged with the tool's jaws. Insert the rivet into the hole in your workpieces.\u003C/li>\u003Cli>\u003Cstrong>Operate the Rivet Tool\u003C/strong>: Squeeze the handles of your rivet tool together until the mandrel snaps. This action expands the rivet body, fills the hole and creates a strong, tight bond between the workpieces.\u003C/li>\u003Cli>\u003Cstrong>Inspect the Rivet\u003C/strong>: After installation, inspect the rivet to ensure it is seated properly and that the mandrel has snapped off at the correct point. A correctly installed rivet will be flush with the material and will be secure.\u003C/li>\u003C/ol>\u003Cp>\u003Cstrong>Note\u003C/strong>: Always refer to manufacturer guidelines when installing blind rivets, as specific instructions can vary based on the type of rivet and tool used.\u003C/p>\u003Ch2>Explore a Wide Range of Blind Rivet Sizes at FSI\u003C/h2>\u003Cp>\u003Ca href=\"https://www.fastenersystems.com/\">Fastener Systems Inc. (FSI)\u003C/a> offers a wide range of blind rivet sizes to meet your project's needs. With different diameters and grip lengths available, our selection ensures effective fastening across various material thicknesses. Our goal is to help you choose the right blind rivet for your work. \u003C/p>\u003Cp>Contact us today for more information on our entire line of \u003Ca href=\"https://www.fastenersystems.com/products/fasteners\">fasteners\u003C/a> and other \u003Ca href=\"https://www.fastenersystems.com/products\">products\u003C/a>.\u003C/p>","https://fsi.nyc3.cdn.digitaloceanspaces.com/blog/_transforms/_1000x750_crop_center-center_80_none/2945/5e9e3b78af4cb3640c238e74_Rivets.webp",[206],{"__typename":158,"id":159,"title":43,"slug":160,"uri":161},{"id":208,"status":148,"title":209,"slug":210,"uri":211,"postDate":212,"dateUpdated":179,"excerptText":213,"blogPostContent":214,"blogFeaturedImageUrl":215,"blogCategories":216},"3378","Wood to Metal Self-Tapping Screws: Benefits and Applications","wood-to-metal-self-tapping-screws","blog/wood-to-metal-self-tapping-screws","December 4, 2023","When it comes to construction and DIY projects, choosing the right type of fastener is crucial. Self-tapping screws have revolutionized the assembly process by providing convenience and efficiency. Unlike regular screws, they have the unique ability to create threads in the material they are driven into. This article explores the details, advantages, and applications of wood-to-metal self-tapping screws, and emphasizes their important function in various projects.","\u003Cp>When it comes to construction and DIY projects, choosing the right type of fastener is crucial. Self-tapping screws have revolutionized the assembly process by providing convenience and efficiency. Unlike regular screws, they have the unique ability to create threads in the material they are driven into. This article explores the details, advantages, and applications of wood-to-metal self-tapping screws, and emphasizes their important function in various projects.\u003C/p>\n\u003Ch2>Understanding the Difference Between Self-Tapping and Self-Drilling Screws\u003C/h2>\n\u003Cp>Self-tapping and self-drilling screws are often mistaken for one another due to their similar names. However, they each serve distinct purposes.\u003C/p>\n\u003Ch3>Their Similarities\u003C/h3>\n\u003Cp>Self-drilling and self-tapping screws both create their own threads within the material they are driven into, which eliminates the need for a separate tapping tool. The primary similarity lies in their design to streamline and simplify the fastening process, for quicker installation.\u003C/p>\n\u003Ch3>Their Differences\u003C/h3>\n\u003Cp>Self-tapping screws are specially designed to tap their own thread as they are screwed into the material. They cut a perfectly sized path for a snug and secure fit.\u003C/p>\n\u003Cp>Self-drilling screws, also known as Tek screws, feature a drill bit-like point that can bore through the material without the need for pre-drilled holes. They also create their thread, but the distinct characteristic is their ability to drill their own hole.\u003C/p>\n\u003Ch2>A Brief History of Self-Tapping Screws\u003C/h2>\n\u003Cp>The creation of self-tapping screws dates back to the early 20th century, an innovation that was driven by the need for efficiency and ease in assembly tasks. Originally, they were primarily used in the production of aircraft and automobiles, where their unique capability to form their own threads proved incredibly useful. Over time, several varieties of self-tapping screws have emerged, each designed to cater to specific materials and applications:\u003C/p>\n\u003Cp>One notable type is the thread-forming screw, designed for plastic, metal, and wood; it creates threads without removing any material.\u003C/p>\n\u003Cp>Another is the thread-cutting screw, more suitable for metal and hard substances, because it removes material during the threading process.\u003C/p>\n\u003Cp>Understanding the different types of self-tapping screws can guide project enthusiasts to make the best choice for their particular needs.\u003C/p>\n\u003Ch2>Wood to Metal Self-Tapping Screws: Definition and Utility\u003C/h2>\n\u003Cp>Wood to metal self-tapping screws have a unique design. They feature a sharp, hardened tip that can easily penetrate metal, and a thread design that has been optimized for both metal and wood. They are perfect for securely fastening wooden elements to metal substrates without the need for pre-drilling. Even when working with thin, sheet-like metals, these screws will ensure a strong joint.\u003C/p>\n\u003Ch3>Typical Applications of Wood to Metal Self-Tapping Screws\u003C/h3>\n\n\n\n\n\u003Cul>\u003Cli>Securing metal hardware to wooden structures (e.g., brackets, hinges)\u003C/li>\u003Cli>Woodworking projects involving metal accents or reinforcements\u003C/li>\u003Cli>Construction of outdoor furniture combining metallic frames with wooden slats\u003C/li>\u003Cli>Installation of wooden facades on metal-framed buildings\u003C/li>\u003Cli>DIY home decor projects integrating wood and metal elements\u003C/li>\u003C/ul>\n\u003Ch3>Advantages of Wood to Metal Self-Tapping Screws\u003C/h3>\u003Cfigure>\u003Cimg src=\"https://fsi.nyc3.cdn.digitaloceanspaces.com/blog/_transforms/_blogPost/3379/image1.webp\" alt=\"Advantages of Wood to Metal Self-Tapping screws\" />\u003C/figure>\n\u003Cp>\u003Cbr />\u003C/p>\n\u003Cp>Adding wood-to-metal self-tapping screws to your projects provides numerous advantages. Let's discover how they can simplify your work, increase practicality, and improve efficiency:\u003Cstrong>\u003Cbr />\u003Cbr />Efficiency and Time-Savings:\u003C/strong> The elimination of pre-drilling steps fast-tracks the assembly process to save time and labor.\u003C/p>\n\u003Cp>\u003Cstrong>Durability and Strength:\u003C/strong> These screws form strong, lasting bonds between dissimilar materials, and resists loosening from material contractions and expansions.\u003C/p>\n\u003Cp>\u003Cstrong>Versatility in Applications:\u003C/strong> Their unique design renders them suitable for a wide range of projects, from simple home improvements to intricate construction tasks.\u003C/p>\n\u003Cp>\u003Cstrong>Ease of Use:\u003C/strong> They simplify the assembly process, and they are user-friendly, which is important to professionals and amateurs alike.\u003C/p>\n\u003Cp>\u003Cstrong>Reduced Material Damage: \u003C/strong>The precise thread design and sharp tip minimize the risk of splitting wood, to ensure cleaner, more professional-looking results.\u003C/p>\u003Ch2>Projects That Benefit from Wood to Metal Self-Tapping Screws\u003C/h2>\n\u003Cp>Here's a list of 10 projects where wood to metal self-tapping screws are ideally suited due to their efficiency, strength, and ease of use:\u003C/p>\n\u003Cp>\u003Cstrong>Custom Metal-Framed Furniture:\u003C/strong> Build unique pieces of furniture, such as coffee tables or bookshelves that combine wooden surfaces with a durable metal frame.\u003C/p>\n\u003Cp>\u003Cstrong>Outdoor Garden Structures: \u003C/strong>Construct pergolas, arbors, or trellises that feature metal posts or brackets for enhanced stability and weather resistance.\u003C/p>\n\u003Cp>\u003Cstrong>Hybrid Storage Solutions:\u003C/strong> Create storage units, tool sheds, or garages with metal siding or roofing for increased durability and security that are affixed to a wooden framework.\u003C/p>\n\u003Cp>\u003Cstrong>Playground Equipment: \u003C/strong>Assemble playground structures that require sturdy metal joints for safety and are complemented with wooden elements for aesthetic appeal and comfort.\u003C/p>\n\u003Cp>\u003Cstrong>Residential Decking Accents:\u003C/strong> Install metal railings or decorative elements to wooden decks to add a modern touch and improve structural integrity.\u003C/p>\n\u003Cp>\u003Cstrong>Creative Interior Decor: \u003C/strong>Craft wall art, mirror frames, or centerpieces that blend the rustic appeal of wood with industrial-style metal components.\u003C/p>\n\u003Cp>\u003Cstrong>Modern Cabinetry and Shelving: \u003C/strong>Design and install kitchen cabinets or storage shelves that utilize metal parts for reinforcement or as a design feature.\u003C/p>\n\u003Cp>\u003Cstrong>Customized Door and Window Frames: \u003C/strong>Erect door or window frames that use metal for support or decoration to ensure a secure fit into wooden structures.\u003C/p>\n\u003Cp>\u003Cstrong>Renovating Automotive Interiors: \u003C/strong>Customize vehicle interiors with wooden panels or accents secured to metal frames or bases, as often seen in luxury or recreational vehicles.\u003C/p>\n\u003Cp>\u003Cstrong>Mixed Material Fencing:\u003C/strong> Construct boundary fences, privacy screens, or gates that marry metal posts and hardware with wooden planks or features, to combine strength with aesthetics.\u003C/p>\n\u003Cp>In all of these projects, the use of wood-to-metal self-tapping screws simplifies the assembly process. These screws create strong and reliable joints without the requirement of pre-drilled holes. It's a practical and efficient way to achieve sturdy connections.\u003C/p>\u003Ch2>Achieve Professional Results with Fastener Systems' Wood-to-Metal Self-Tapping Screws\u003C/h2>\n\u003Cp>Use \u003Ca href=\"https://www.fastenersystems.com/\">Fastener Systems Inc.\u003C/a> wood-to-metal \u003Ca href=\"https://www.fastenersystems.com/products/self-tapping-screws\">self-tapping screws\u003C/a> for better efficiency in your projects. Our quality screws simplify your work, regardless of your skill level. We also offer a variety of other \u003Ca href=\"https://www.fastenersystems.com/fasteners\">fasteners\u003C/a> to suit many diverse construction needs.\u003C/p>\n\u003Cp>\u003Ca href=\"https://www.fastenersystems.com/contact\">Contact us today\u003C/a> for a quote!\u003C/p>","https://fsi.nyc3.cdn.digitaloceanspaces.com/blog/_transforms/_1000x750_crop_center-center_80_none/3380/image2.webp",[217],{"__typename":158,"id":159,"title":43,"slug":160,"uri":161},{"id":219,"status":148,"title":220,"slug":221,"uri":222,"postDate":223,"dateUpdated":179,"excerptText":224,"blogPostContent":225,"blogFeaturedImageUrl":226,"blogCategories":227},"3456","Pan Head Phillips Screws: Versatile Uses and Installation Tips","pan-head-phillips-screw","blog/pan-head-phillips-screw","November 22, 2023","This guide discusses the world of Pan head Phillips screws, details what they are, where they are most commonly used, and the advantages they bring to these applications.","\u003Cp>The humble pan-head Phillips screw plays a vital role in numerous applications, from simple DIY tasks at home to complex industrial projects. Its design makes it a versatile tool that blends aesthetic appeal with functionality. This guide discusses the world of Pan head Phillips screws, details what they are, where they are most commonly used, and the advantages they bring to these applications.\u003C/p>\n\u003Cp>We also provide practical tips on dealing with and installing this type of screw to ensure that your task is completed efficiently and effectively. Whether you're a seasoned professional or a DIY enthusiast, this comprehensive guide aims to enhance your understanding and application of this essential fastener.\u003C/p>\n\u003Ch2>Understanding Pan Head Phillips Screws\u003C/h2>\n\u003Ch3>The Anatomy of Pan Head Phillips Screws\u003C/h3>\n\u003Cp>\u003Ca href=\"https://www.fastenersystems.com/fasteners\">Pan head Phillips screws \u003C/a>are a type of fastener with a flat or slightly rounded top and vertical sides. The head shape allows for a smooth finish on the surface after driving. \u003C/p>\n\u003Cp>They use a cross-shaped recess (Phillips) on the head for tightening or loosening with the corresponding screwdriver. These screws are commonly used in various applications where the screw head must sit flush or just above the material's surface.\u003C/p>\n\u003Ch2>Comprehensive Applications of Pan Head Phillips Screws\u003C/h2>\n\u003Cp>Pan-head Phillips screws are among the most commonly used fasteners in various industries due to their practical design. The Pan head allows for good control over torque when tightening, while the Phillips design reduces the chance of the driver slipping out and potentially damaging surrounding areas. Here are several industries where these screws are essential, along with specific uses and benefits in each:\u003C/p>\n\u003Ch3>Construction Industry\u003C/h3>\n\u003Cul>\u003Cli>\u003Cstrong>Building Frameworks: \u003C/strong>Used in wood or metal frameworks, Pan head Phillips screws provide high holding strength and are easily driven with power tools to help ensure that structures are robust.\u003C/li>\u003Cli>\u003Cstrong>Interior Drywall Installation:\u003C/strong> Their flat bearing surface makes them ideal for holding drywall in place, to reduce the chance of material damage around the insertion point.\u003C/li>\u003Cli>\u003Cstrong>Outdoor Fixtures: \u003C/strong>These screws are often coated with weather-resistant materials, which makes them suitable for outdoor use in items like decking, stairs, or playground equipment.\u003C/li>\u003C/ul>\n\u003Ch3>Manufacturing Industry\u003C/h3>\n\u003Cul>\u003Cli>\u003Cstrong>Assembly Lines:\u003C/strong> Widely used in the assembly of various products, their standardized design simplifies manufacturing processes and tooling requirements.\u003C/li>\u003Cli>\u003Cstrong>Machinery Production:\u003C/strong> In machinery, they allow for secure fastening that can withstand operational stresses, and they are easily replaceable if maintenance is required.\u003C/li>\u003Cli>\u003Cstrong>Automotive Applications:\u003C/strong> Used in car interiors and compartments for secure assembly with a clean finish, they reduce the potential for corrosion or rust.\u003C/li>\u003C/ul>\n\u003Ch3>Electronics Industry\u003C/h3>\n\u003Cul>\u003Cli>\u003Cstrong>Consumer Electronics Assembly:\u003C/strong> They are used in devices like TVs, computers, and home appliances for secure casing assembly to provide durability without damaging sensitive electronic components.\u003C/li>\u003Cli>\u003Cstrong>Data Center Hardware: \u003C/strong>Helps in mounting servers, routers, and other rack-mounted devices, by providing strong, reliable connections that can withstand the weight and extended use.\u003C/li>\u003Cli>\u003Cstrong>Electronic Enclosures: \u003C/strong>Used in securing covers and panels to allow for easy access while maintaining a protective environment for sensitive components.\u003C/li>\u003C/ul>\n\u003Ch3>Furniture Industry\u003C/h3>\n\u003Cul>\u003Cli>\u003Cstrong>Furniture Assembly: \u003C/strong>Essential for the assembly of desks, chairs, and shelving, these screws provide the necessary strength and aesthetic finish so that the furniture is both functional and visually appealing.\u003C/li>\u003Cli>\u003Cstrong>Cabinet Installation: \u003C/strong>They are commonly used for hanging cabinets securely while also allowing for easy adjustment or removal for access or redecorating.\u003C/li>\u003C/ul>\n\u003Ch3>DIY and Home Improvement\u003C/h3>\n\u003Cp>\u003Cstrong>Decorative Installations:\u003C/strong> Ideal for hanging picture frames, and mirrors, or installing light fixtures, to provide a secure fit with a clean, professional look.\u003C/p>\n\u003Cp>\u003Cstrong>Home Repairs:\u003C/strong> For general-purpose repairs, these versatile screws are a handy solution for fixing loose hinges to assembling outdoor fixtures.\u003C/p>\n\u003Cp>\u003Cstrong>Custom Projects: \u003C/strong>DIY enthusiasts often prefer these screws for custom projects due to their easy driving, reliable hold, and the widespread availability of compatible tools.\u003C/p>\n\u003Ch3>Aerospace and Defense\u003C/h3>\n\u003Cp>Equipment Assembly: Specialty-grade Pan head Phillips screws are used in the assembly of non-critical internal components that benefit from controlled torque application.\u003C/p>\n\u003Cp>Maintenance and Repair Operations (MRO): For routine maintenance and repair, their standardization allows for the efficient interchangeability of parts and streamlined processes.\u003C/p>\n\u003Cp>In each of these applications, Pan head Phillips screws offer various benefits including ease of use, reliability in holding, and a clean aesthetic finish. They are compatible with automated assembly systems, which makes them an integral component in modern manufacturing and construction practices.\u003C/p>\n\u003Ch2>Why Stainless Steel Pan Head Screws Are Preferable\u003C/h2>\u003Cfigure>\u003Cimg src=\"https://fsi.nyc3.cdn.digitaloceanspaces.com/blog/_transforms/_blogPost/3460/image2_2024-01-18-163214_bikh.webp\" alt=\"Stainless Steel Pan Head Screws\" />\u003C/figure>\n\u003Ch3>Identifying the Benefits of Stainless Steel\u003C/h3>\n\u003Cp>Opting for stainless steel versions ensures enhanced durability, significant resistance to corrosion, and suitability for challenging environments, for longevity and reliable strength.\u003C/p>\n\u003Ch3>Ensuring Stability in High-Vibration Environments\u003C/h3>\n\u003Cp>One critical benefit of pan-head Phillips screws is their ability to resist unfastening torque, which is particularly important in machinery or environments subject to frequent movements or vibrations. Correct installation and sometimes the use of additional locking mechanisms can help maintain this stability.\u003C/p>\n\u003Ch2>Mastering the Installation of Pan Head Phillips Screws\u003C/h2>\n\u003Ch3>Best Practices for Effective Application\u003C/h3>\n\u003Cp>When installing Pan head Phillips screws, several best practices should be followed to prevent damage to both the screw head and the material.\u003C/p>\n\u003Cp>Ensure you are using the correct screwdriver size that perfectly fits the screw's head in order to avoid stripping the recess.\u003C/p>\n\u003Cp>Apply steady pressure and turn the screwdriver slowly, so that it remains aligned with the screw to prevent slippage or damage to the surrounding material.\u003C/p>\n\u003Cp>For tougher materials, pre-drilling a pilot hole slightly smaller than the screw diameter can ease the installation and reduce the risk of splitting or cracking the material.\u003C/p>\n\u003Cp>Avoid over tightening as it can strip the screw's threads or damage the material being fastened.\u003C/p>\n\u003Cp>Finally, using a screwdriver with a torque control feature can provide additional security by preventing excessive force application.\u003C/p>\n\u003Ch3>Technical Insights: Understanding Screw Dimensions\u003C/h3>\n\u003Cp>A pan-head phillips screw size chart is an essential reference that helps users select the right screw dimensions for specific tasks, to ensure that the screws fit correctly and that they provide the intended level of hold or clamping.\u003C/p>\n\u003Ch3>Pan Head Phillips Screw Size Reference Chart\u003C/h3>\n\u003Cp>This chart provides a basic understanding of the sizes and applications of Pan head Phillips screws. However, it's always best to consult with a professional or manufacturer for specific project requirements.\u003C/p>\n\u003Ch2>Upgrade Your Project with Pan Head Phillips Screws from Fastener Systems\u003C/h2>\n\u003Cp>Don't compromise on the quality or reliability of your project. Trust \u003Ca href=\"https://www.fastenersystems.com/\">Fastener Systems Inc.\u003C/a> for your Pan head Phillips screws needs. Explore our complete range of \u003Ca href=\"https://www.fastenersystems.com/tools-and-products\">products\u003C/a>, and experience the difference that our commitment to quality makes. Your project deserves the best, and we're here to provide it.\u003C/p>\n\u003Cp>\u003Ca href=\"https://www.fastenersystems.com/contact\">Contact us today\u003C/a> for more information and a custom quote!\u003C/p>","https://fsi.nyc3.cdn.digitaloceanspaces.com/blog/_transforms/_1000x750_crop_center-center_80_none/3459/image1_2024-01-18-163052_cqgu.webp",[228],{"__typename":158,"id":159,"title":43,"slug":160,"uri":161},{"id":230,"status":148,"title":231,"slug":232,"uri":233,"postDate":234,"dateUpdated":179,"excerptText":235,"blogPostContent":236,"blogFeaturedImageUrl":237,"blogCategories":238},"3450","Hex Washer Head Screws: Uses, Advantages, and Applications","hex-washer-head-screw","blog/hex-washer-head-screw","November 15, 2023","This article delves into the practicality, versatility, and integral role of Hex washer head screws in a wide array of applications. From furniture assembly to deck building, they prove to be a reliable fastener capable of providing a solid hold under various levels of tension and pressure.","\u003Cp>In the realm of home improvement and construction, the smallest components often play the most critical roles. One such component is the Hex washer head screw. \u003C/p>\n\u003Cp>This article delves into the practicality, versatility, and integral role of Hex washer head screws in a wide array of applications. From furniture assembly to deck building, they prove to be a reliable fastener capable of providing a solid hold under various levels of tension and pressure.\u003C/p>\n\u003Ch2>What Are Hex Washer Head Screws?\u003C/h2>\n\u003Cp>\u003Ca href=\"https://www.fastenersystems.com/products/hex-washer-head-fasteners-yellow-zinc-plated\">Hex washer head screws\u003C/a> are known for their characteristic hexagonal head and built-in washer, that provides unique benefits over traditional screws. Their design enhances grip strength, reduces surface damage, and ensures a secure fit, which makes them vital in various applications.\u003C/p>\n\u003Ch3>Hex Washer vs. Hex Cap: Clearing Up the Confusion\u003C/h3>\n\u003Cp>While often confused with Hex cap screws, Hex washer head screws feature an attached washer that creates an even load distribution, which is crucial in delicate installations. Hex cap screws, however, do not have this element, and are used instead for creating extremely tight, exacting assemblies.\u003C/p>\n\u003Ch2>How Hex Washer Head Screws Changed Home Improvement Practices\u003C/h2>\n\u003Cp>Hex washer head screws have revolutionized home improvement practices in several ways.\u003C/p>\n\u003Cp>Their unique design allows for enhanced grip, so they are less likely to slip or strip during installation. This means that DIY enthusiasts and professionals alike can work more efficiently and with less risk of damaging the screw or the material.\u003C/p>\n\u003Cp>Moreover, the built-in washer provides a broader surface area that distributes the load more evenly and reduces the risk of surface damage. This makes them ideal for use in materials that are susceptible to splitting or cracking.\u003C/p>\n\u003Cp>Finally, the hexagonal head design allows for better torque transfer from the tool to the screw, for tighter connections and stronger builds.\u003C/p>\n\u003Cp>These improvements in efficiency, safety, and strength have made Hex washer head screws a game-changer in the world of home improvement!\u003C/p>\n\u003Ch2>9 Typical Applications of Hex Washer Head Screws\u003C/h2>\u003Cfigure>\u003Cimg src=\"https://fsi.nyc3.cdn.digitaloceanspaces.com/blog/_transforms/_blogPost/3452/Head-washer-Screws.webp\" alt=\"Hex Washer Head Screws\" />\u003C/figure>\n\u003Cp>Not just for construction, Hex washer head screws are extremely useful in various scenarios due to their durability, secure fit, and ease of use.\u003C/p>\u003Col>\u003Cli>\u003Cstrong>Fastening Wood to Wood: \u003C/strong>Hex washer head screws are often used for fastening wood to wood due to their strong grip and stability.\u003C/li>\u003Cli>\u003Cstrong>Attaching Metal to Wood:\u003C/strong> These screws can also be used to secure metal pieces to wooden structures, so they are versatile for various projects.\u003C/li>\u003Cli>\u003Cstrong>Self-Drilling Applications:\u003C/strong> Some Hex washer head screws are self-drilling, which means that they can drill their own hole in thin gauge steel, fiberglass, or wood. This makes them useful for quick installation tasks where pre-drilling is not possible or desired.\u003C/li>\u003Cli>\u003Cstrong>Furniture Assembly: \u003C/strong>These screws can be used in furniture assembly, where they provide a strong hold and resistance to stripping.\u003C/li>\u003Cli>\u003Cstrong>Deck Building:\u003C/strong> Hex washer head screws are commonly used in deck building. Their strength and durability make them ideal for outdoor construction projects.\u003C/li>\u003Cli>\u003Cstrong>Securing Wall Hangings:\u003C/strong> If you have heavy wall hangings or fixtures, these screws can provide a robust anchor in the wall.\u003C/li>\u003Cli>\u003Cstrong>Attaching Hardware: \u003C/strong>These screws are often used to attach hardware like handles, hooks, and hinges to doors or cabinets.\u003C/li>\u003Cli>\u003Cstrong>Building Shelves:\u003C/strong> When building shelves, Hex washer head screws can provide a sturdy hold, to help ensure that the shelf can bear weight without loosening over time.\u003C/li>\u003Cli>\u003Cstrong>Constructing Fences:\u003C/strong> Given their strength and durability, these screws are often used in fence construction, where they can withstand weather conditions and heavy loads.\u003C/li>\u003C/ol>\u003Ch2>Multiple Industries, One Solution\u003C/h2>\n\u003Cp>Hex washer head screws are not limited to construction; they're also integral in automotive, home appliance, and technology manufacturing, and they provide reliable fastening everywhere they're used.\u003C/p>\u003Ch2>The Pros and Cons of Hex Washer Head Screws\u003C/h2>\n\u003Cp>Hex washer head screws are widely used for their unique features, but like any hardware, they come with both advantages and disadvantages. Understanding the pros and cons can help individuals make informed decisions for their specific projects. Here is a comprehensive list of the pros and cons of Hex washer head screws:\u003C/p>\u003Ch3>Pros\u003C/h3>\n\u003Cp>Increased Holding Power: The integrated washer provides a broader surface area, to enhance the screw's grip and reduce the risk of pull-through or material damage, especially in softer materials.\u003C/p>\n\u003Cp>\u003Cstrong>Versatility\u003C/strong>: These screws are suitable for a variety of materials, including wood, metal, and plastics, which makes them versatile for various projects.\u003C/p>\n\u003Cp>\u003Cstrong>Convenience in Installation:\u003C/strong> The hexagonal head design allows for a tighter, more secure connection with the tool, to reduce the chance of slippage during installation or extraction.\u003C/p>\n\u003Cp>\u003Cstrong>Self-Drilling Options: \u003C/strong>Many Hex washer head screws are \u003Ca href=\"https://www.fastenersystems.com/products/stainless-steel-hex-washer-head-self-drilling-fasteners-2\">self-drilling\u003C/a>, which eliminates the need for pre-drilling holes and saves time and effort, especially in repetitive tasks.\u003C/p>\n\u003Cp>\u003Cstrong>Durability: \u003C/strong>They are often available in corrosion-resistant materials, so they are suitable for outdoor or humid environments, to help ensure the longevity of the application.\u003C/p>\n\u003Cp>\u003Cstrong>Better Load Distribution: \u003C/strong>The washer helps distribute the load evenly, makes the screw more stable under pressure, and reduces the chances of the material being fastened, warping or getting damaged.\u003C/p>\u003Ch3>Cons\u003C/h3>\n\u003Cp>\u003Cstrong>Aesthetic Intrusiveness:\u003C/strong> The prominent head and washer can be more visible compared to other screw types, which might not be desirable for projects that require a seamless aesthetic.\u003C/p>\n\u003Cp>\u003Cstrong>Requires Compatible Tool:\u003C/strong> Installation needs a tool compatible with the hexagonal head, which might not be as commonly available to all DIY enthusiasts as standard flat or Phillips head drivers.\u003C/p>\n\u003Cp>\u003Cstrong>Potential for Stripping: \u003C/strong>If over-torqued, the Hex head might get stripped, which makes it difficult to achieve a secure fit or to remove the screw later.\u003C/p>\n\u003Cp>Understanding these pros and cons is crucial when considering Hex washer head screws for any project. By weighing these factors, individuals can determine if these fasteners are the right fit for their specific application needs.\u003C/p>\u003Ch2>Sizing and Drilling Capabilities of Hex Washer Head Screws\u003C/h2>\u003Ch3>Navigating Through Head and Thread Dimensions\u003C/h3>\n\u003Cp>The head and thread dimensions of a Hex washer head screw are two key characteristics that dictate its application. The head dimensions, primarily the head diameter and height, define how the screw will sit on the material surface, while the thread dimensions, including the thread diameter and pitch, determine the screw's holding power. Here are some of the common dimensions for Hex washer head screws\u003C/p>\n\u003Cp>These dimensions translate into practical applications and dictate how the screw interacts with the material it’s used on. For example, a greater head diameter and height allow the screw to sit more flush with the material, to reduce the chance of pull-through, while a larger thread diameter and higher thread pitch provide increased holding power.\u003C/p>\u003Ch2>Fastener Systems Inc. - Quality Hex Washer Head Screws for Your Home Improvement Needs\u003C/h2>\n\u003Cp>At \u003Ca href=\"https://www.fastenersystems.com/\">Fastener Systems Inc.\u003C/a>, we're passionate about providing quality solutions for your home improvement needs. Our selection of \u003Ca href=\"https://www.fastenersystems.com/products/hex-washer-head-tapcons\">Hex washer head screws \u003C/a>offers versatility, durability, convenience, and superior holding power. Whether you're building a deck, assembling furniture, or undertaking a construction project, our premium quality \u003Ca href=\"https://www.fastenersystems.com/fasteners\">fasteners\u003C/a> are designed to last.\u003C/p>\n\u003Cp>\u003Ca href=\"https://www.fastenersystems.com/contact\">Contact us today \u003C/a>for more information or a fast quote!\u003C/p>","https://fsi.nyc3.cdn.digitaloceanspaces.com/blog/_transforms/_1000x750_crop_center-center_80_none/3451/Hex-Washer-Head-Screws.webp",[239],{"__typename":158,"id":159,"title":43,"slug":160,"uri":161},{"id":241,"status":148,"title":242,"slug":243,"uri":244,"postDate":245,"dateUpdated":246,"excerptText":247,"blogPostContent":248,"blogFeaturedImageUrl":249,"blogCategories":250},"2884","Exploring Wood Screw Head Types: A Comprehensive Guide","types-of-wood-screw-heads","blog/types-of-wood-screw-heads","November 2, 2023","December 6, 2023","Explore the diverse types of wood screw heads with this comprehensive guide. Learn about Flat, Oval, Round, Pan, Trim, Truss, and Washer Heads, their unique features, and specific applications in woodworking. Also, understand various drive styles like Slotted, Phillips, Square, Hex, and Torx, essential for choosing the right screw for your project. Perfect for DIY enthusiasts and professionals, this guide, in collaboration with Fastener Systems Inc., offers expert advice for successful woodworking projects.","\u003Cp>Fastening wood elements securely requires the right equipment, and when it comes to joining wood, different types of wood screw heads are a fundamental component. In this comprehensive guide, we will explore the varied types of wood screw heads, delve into their characteristics, and understand their specific applications. Whether you are a DIY enthusiast or a seasoned woodworker, this guide, in collaboration with Fastener Systems, will enhance your knowledge and application of wood screws.\u003C/p>\n\u003Ch2>What Are Wood Screws?\u003C/h2>\n\u003Cp>Wood screws are designed specifically for connecting wood pieces. They feature coarse threads to grip the wood securely and a pointed tip to penetrate the wood surface efficiently. Knowing the different types of wood screw heads is essential as it helps in choosing the right screw for the job, and helps to ensure a firm, secure, and aesthetic connection.\u003C/p>\n\u003Ch2>Understanding Types of Wood Screw Heads\u003C/h2>\n\u003Cul>\u003Cli>\u003Cstrong>Flat Head: \u003C/strong>It is one of the most common types of wood screw heads. They sit flush against the wood for a smooth surface.\u003C/li>\u003Cli>\u003Cstrong>Oval Head: \u003C/strong>Slightly domed and offering a decorative finish, oval head screws are used when a more aesthetic finish is desired, without sacrificing the screw's strength.\u003C/li>\u003Cli>\u003Cstrong>Round Head:\u003C/strong> Featuring a fully rounded top, round head screws are employed when a higher profile is acceptable or desired. They offer more strength due to their larger diameter.\u003C/li>\u003Cli>\u003Cstrong>Pan Head:\u003C/strong> Similar to round heads but with a slightly flatter top, pan head screws are versatile and used where the screw head will remain visible.\u003C/li>\u003Cli>\u003Cstrong>Trim Head:\u003C/strong> With a smaller diameter, trim head screws are less visible and often used for carpentry and woodworking applications where appearance is important.\u003C/li>\u003Cli>\u003Cstrong>Truss Head: \u003C/strong>Truss head screws have a wide, flat head with a low profile and large diameter, that gives them a large bearing surface.\u003C/li>\u003Cli>\u003Cstrong>Washer Head:\u003C/strong> These screws come with a built-in washer-like head that has a larger surface area. The increased bearing surface distributes the load over a greater area, to reduce the risk of damage to soft materials.\u003C/li>\u003C/ul>\n\u003Ch2>Different Drive Head Styles\u003C/h2>\n\u003Cfigure>\u003Cimg src=\"https://fsi.nyc3.cdn.digitaloceanspaces.com/blog/_transforms/_blogPost/2886/6543c9fbb3079d641547d135_image2.webp\" alt=\"Different Drive Head Styles\" />\u003C/figure>\n\u003Cp>\u003Cbr />\u003C/p>\n\u003Cp>Just as important as the type of screw head is the driving head style, which refers to the shape of the recess on the screw head where the tool bit engages. Let's explore some of the most common driving head styles:\u003C/p>\n\u003Ch3>Slotted\u003C/h3>\n\u003Cp>This is the traditional, straight-line slot that a flat-blade screwdriver fits into. While not as popular as they used to be, slotted screws are still used for their simplicity and universal accessibility.\u003C/p>\n\u003Ch3>Phillips\u003C/h3>\n\u003Cp>The X-shaped recess is designed for a Phillips head screwdriver. It's one of the most common driving head styles due to its ability to center the tool, which reduces the chance of slippage.\u003C/p>\n\u003Ch3>Square (Robertson)\u003C/h3>\n\u003Cp>These screws feature a square-shaped recess and require a special square or Robertson screwdriver. They offer excellent resistance to cam out (slipping out of the recess while being driven) and are frequently used in woodworking.\u003C/p>\n\u003Ch3>Hex\u003C/h3>\n\u003Cp>A hex socket screw, also known as an Allen screw, has a hexagonal recess and requires an Allen wrench for installation. Hex screws are often used for furniture assembly and in applications requiring high torque.\u003C/p>\n\u003Ch3>Star (Torx)\u003C/h3>\n\u003Cp>These screws have a unique star-shaped recess that provides a high torque transfer, and reduces the chance of slippage. Torx screws are commonly used in automobiles, motorcycles, and computer systems.\u003C/p>\n\u003Cp>Understanding the different types of wood screw heads and driving head styles can make your woodworking projects more successful. \u003C/p>\n\u003Ch2>Applications of Different Types of Wood Screw Heads\u003C/h2>\n\u003Cp>Understanding the applications of the various types of wood screw heads ensures effective and reliable wood joining. Below are the typical applications for each screw head type:\u003C/p>\n\u003Cul>\u003Cli>Flat Head: Often used in carpentry and building, suitable for countersinking.\u003C/li>\u003Cli>Oval Head: Ideal for decorative applications like trim and molding.\u003C/li>\u003Cli>Round Head: Suitable for attaching hardware to wood, such as hinges and locks.\u003C/li>\u003Cli>Pan Head: Used in metal hardware and for joining thin pieces of wood.\u003C/li>\u003Cli>Trim Head: Perfect for applications where a clean finish is required, like in cabinet making and trim work.\u003C/li>\u003Cli>Truss Head: Truss head screws are typically used for applications that require a large bearing surface. Their extra-wide, low-profile heads distribute the force over a larger area to reduce the risk of material damage. This makes them ideal for thin, fragile materials and for installation in soft substrates, such as those found in aerospace manufacturing.\u003C/li>\u003Cli>Washer Head: These are ideal for applications that require a large surface area to distribute the load. The built-in washer-like head helps prevent damage to soft materials and pulls flush against the surface to provide a clean and sturdy hold. This makes them suitable for wall hangings, mounting brackets, and other applications where a wide load distribution is needed.\u003C/li>\u003C/ul>\n\u003Ch2>Choosing the Right Screw for Your Project\u003C/h2>\n\u003Cp>Selecting the right screw involves considering the wood type, thickness, and the role of the screw in the project. Here are some considerations:\u003C/p>\n\u003Cul>\u003Cli>Material: Ensure the screw material is compatible with the wood to avoid reactions and corrosion.\u003C/li>\u003Cli>Length and Diameter: These should be appropriate to the wood’s thickness and the load the connection will bear.\u003C/li>\u003Cli>Drive Type: Consider the screw’s drive type – Phillips, square, or Torx, as this affects the ease of installation and the strength of the drive.\u003C/li>\u003C/ul>\n\u003Ch2>Discover the Perfect Wood Screw for Your Project with Fastener Systems\u003C/h2>\n\u003Cp>At Fastener Systems Inc., we understand the significance of selecting the right wood screw for your project. Our comprehensive range of wood screws covers all types and head styles, for diverse applications. Don't let the multitude of choices overwhelm you. Our expert team is just a click away, and ready to guide you in picking the perfect screw that aligns with your project requirements. \u003C/p>\n\u003Cp>Contact us today and explore our complete selection of high-quality, durable, and reliable fasteners!\u003C/p>","https://fsi.nyc3.cdn.digitaloceanspaces.com/blog/_transforms/_1000x750_crop_center-center_80_none/2885/6543c9eecbd4e9f63efab17e_image1.webp",[251],{"__typename":158,"id":159,"title":43,"slug":160,"uri":161},{"id":253,"status":148,"title":254,"slug":255,"uri":256,"postDate":245,"dateUpdated":246,"excerptText":257,"blogPostContent":258,"blogFeaturedImageUrl":259,"blogCategories":260},"2890","Understanding Long Self-Drilling Screws and Where to Buy","long-self-drilling-screws","blog/long-self-drilling-screws","Maximize efficiency and strength with long self-drilling screws, designed to drill their own holes for fastening. Ideal for heavy-duty construction, metalwork, and wood framing, these screws offer superior hold. Key features include 410 stainless and carbon steel materials, versatility in joining wood, metal, and plastic, and various head types like bugle and hex flange. They cater to diverse industries, from metal roofing and HVAC to automotive and aerospace, eliminating the need for pre-drilling. For DIY projects, they provide simplicity and durability. Trust Fastener Systems for a wide selection of reliable long self-drilling screws and enhance your project's integrity.","\u003Cp>Long self-drilling screws are designed for efficiency and robust performance in a variety of applications. They are distinguished by their ability to drill their own holes as they are driven into the material. This feature becomes increasingly beneficial with length, as longer screws are often used in applications that require superior hold and strength. Whether it's heavy-duty construction, joining metal to metal, or securing wooden frames, long self-drilling screws are a practical solution.\u003C/p>\n\u003Ch2>7 Features to Seek in Long Self-Drilling Screws\u003C/h2>\n\u003Cul>\u003Cli>Material: Typically 410 stainless and carbon steel\u003C/li>\u003Cli>Types of materials to be joined: wood, metal, plastic\u003C/li>\u003Cli>Head type: Bugle head, button head, flat head, hex flange head\u003C/li>\u003Cli>Shank size: Depends on size of screw head (#6 through #14)\u003C/li>\u003Cli>Threads per inch: Generally, a lower TPI is better for softwoods, and a higher TPI is better for metal and hardwoods\u003C/li>\u003Cli>Screw point: Needle point or drill point\u003C/li>\u003Cli>Plating: Zinc, galvanized, ceramic and stainless steel\u003C/li>\u003C/ul>\n\u003Ch2>Common Applications of Self-Drilling Screws\u003C/h2>\n\u003Cp>Self-drilling screws have a wide range of applications across different industries. Some common applications include:\u003C/p>\n\u003Ch3>Metal Roofing\u003C/h3>\n\u003Cp>\u003Ca href=\"/products/fasteners\">Self-drilling screws\u003C/a> are extensively used in metal roofing installations. They provide a secure and weather-resistant attachment between the metal sheets and the underlying structure. The drill point of the screw easily penetrates the metal to create a tight and reliable connection.\u003C/p>\n\u003Ch3>HVAC Systems\u003C/h3>\n\u003Cp>Self-drilling screws are commonly used in HVAC (Heating, Ventilation, and Air Conditioning) systems. They are used to secure ductwork components, such as ducts, elbows, and registers. The self-drilling feature allows for quick and easy installation, to save both time and labor.\u003Cbr />Construction Projects\u003C/p>\n\u003Cp>Self-drilling screws find applications in various construction projects, such as framing, drywall installation, and decking. They are used to secure panels, boards, and other materials together in order to help ensure a sturdy and reliable structure.\u003C/p>\n\u003Ch3>Automotive/Aerospace Industry\u003C/h3>\n\u003Cp>These industries demand precision, durability, and reliability, and that's exactly what these screws deliver.\u003C/p>\n\u003Cp>In automotive assembly, they're widely used in body and chassis applications, making it quick and hassle-free to join different panels and components.\u003Cbr />Similarly, in the aerospace sector, they're crucial for assembling aircraft frames and interior components, to save assembly time without compromising structural integrity.\u003C/p>\n\u003Cp>With self-drilling screws, there's no need for pre-drilling, which streamlines the manufacturing process to save time and minimize errors.\u003C/p>\n\u003Ch3>DIY Projects\u003C/h3>\n\u003Cp>For DIY enthusiasts, long self-drilling screws are an indispensable tool. The ability to bore their own holes simplifies many home improvement and crafting projects, ranging from assembling furniture to creating custom shelving units or putting together garden structures. The strength and hold of longer screws add to the sturdiness and durability of the finished project, to give DIYers confidence in their work. \u003C/p>\n\u003Cp>Self-drilling screws are also a great asset in various woodworking projects, for swift and secure connections between different pieces of wood. Their ease of use makes them an ideal choice for both beginners and experienced DIY practitioners.\u003C/p>\n\u003Ch3>Benefits of Long Self-Drilling Screws\u003C/h3>\n\u003Cp>Long self-drilling screws offer several advantages over their shorter counterparts. Here are some key benefits:\u003C/p>\n\u003Ch3>Increased Penetration\u003C/h3>\n\u003Cp>The extended length of long self-drilling screws allows for deeper penetration into the material being fastened. This is particularly useful when working with thick or dense materials, where a standard-length screw may not provide sufficient holding power.\u003C/p>\n\u003Ch3>Flexibility in Applications\u003C/h3>\n\u003Cp>Self-drilling screws provide greater flexibility in terms of applications. They can be used for joining materials of varying thicknesses, including multiple layers of material.\u003C/p>\n\u003Ch3>Improved Stability\u003C/h3>\n\u003Cp>The longer length of these screws enhances the stability and strength of the connection. This is especially important in structural applications, where the integrity of the joint is crucial. Long self-drilling screws ensure a secure and reliable attachment, and minimize the risk of loosening or failure over time.\u003C/p>\n\u003Ch3>Time and Labor Savings\u003C/h3>\n\u003Cp>By eliminating the need for pre-drilling, long self-drilling screws significantly reduce installation time and labor. This is especially beneficial when working on large-scale projects that require a high volume of fasteners.\u003C/p>\n\u003Ch2>Trust Fastener Systems for a Wide Range of Dependable Long Self-Drilling Screws\u003C/h2>\n\u003Cp>For all your fastening needs, trust \u003Ca href=\"/\">Fastener Systems Inc\u003C/a>., your go-to source for high-quality long self-drilling screws. Explore our wide range of \u003Ca href=\"/products/fasteners\">dependable fasteners\u003C/a> today and experience the difference they can make in your projects.\u003C/p>\n\u003Cp>\u003Ca href=\"https://www.fastenersystems.com/contact-us\">Contact us today\u003C/a> for a fast quote on your next project!\u003C/p>","https://fsi.nyc3.cdn.digitaloceanspaces.com/blog/_transforms/_1000x750_crop_center-center_80_none/2891/5e9e053404b24da592ab5477_Self-Drilling-Fasteners-with-Washers.webp",[261],{"__typename":158,"id":159,"title":43,"slug":160,"uri":161},{"id":263,"status":148,"title":264,"slug":265,"uri":266,"postDate":267,"dateUpdated":179,"excerptText":268,"blogPostContent":269,"blogFeaturedImageUrl":270,"blogCategories":271},"3430","The Ultimate Guide to Concrete Drop-In Anchors: Installation and Benefits","drop-in-concrete-anchors","blog/drop-in-concrete-anchors","November 1, 2023","Discover how using the right anchors can prevent common frustrations and rework to save you time and money on your home improvement tasks. No more guesswork—just solid, reliable results. Keep reading to find out how simple, yet essential, using concrete drop-in anchors is for your next home project.","\u003Cp>Understanding how to use concrete drop-in anchors can make your home projects more professional, stable, and long-lasting. If you've ever had trouble with wall fixtures staying put or outdoor installations wobbling, these anchors could be the solution you need.\u003C/p>\n\u003Cp>In this guide, you'll discover how using the right anchors can prevent common frustrations and rework to save you time and money on your home improvement tasks. No more guesswork—just solid, reliable results. Keep reading to find out how simple, yet essential, using concrete drop-in anchors is for your next home project.\u003C/p>\u003Ch2>What Are Drop-in Anchors?\u003C/h2>\n\u003Cp>Concrete drop-in anchors are specialized fasteners that establish strong holding points in, or on, concrete surfaces. They are internally threaded components that are pivotal in construction and home projects that provide secure points for bolts or threaded rods.\u003C/p>\u003Ch3>Composition of Drop-in Anchors\u003C/h3>\n\u003Cp>Drop-in anchors are typically made from stainless steel or zinc-plated steel, materials known for their exceptional strength, corrosion resistance, and durability.\u003C/p>\u003Ch3>Dimensions of Drop-in Anchors\u003C/h3>\n\u003Cp>Drop-in anchors come in various sizes to suit different project requirements. Their dimensions typically span from ¼-inch to ¾-inch in diameter, with lengths ranging from 1-inch to 3-inches. These variations in size enable the drop-in anchors to provide secure fastening solutions across an array of construction and home improvement applications.\u003C/p>\u003Ch2>The Different Types of Concrete Drop-In Anchors\u003C/h2>\n\u003Cp>Different concrete anchors serve various purposes, each suitable for specific scenarios. Knowing the different types will be beneficial in selecting the most appropriate anchor for your project.\u003C/p>\u003Cul>\u003Cli>\u003Cstrong>Wedge and Sleeve Anchors:\u003C/strong> For tasks that require a strong hold\u003C/li>\u003Cli>\u003Cstrong>Large Concrete Anchors\u003C/strong>: Used where high-load support is necessary\u003C/li>\u003Cli>\u003Cstrong>Lag Shields and Plastic Anchors:\u003C/strong> Suitable for moderate-use applications\u003C/li>\u003Cli>\u003Cstrong>Toggle Bolts:\u003C/strong> Useful for hollow spaces behind solid surfaces\u003C/li>\u003C/ul>\u003Ch2>8 Concrete Drop-in Anchor Applications\u003C/h2>\n\u003Cp>Drop-in anchors are versatile, and are used in various structural and decorative contexts:\u003C/p>\u003Ch3>1. Mount Shelving and Cabinets\u003C/h3>\n\u003Cp>They provide the necessary support for heavy items on walls, such as shelving units, wall-mounted cabinets, and bookcases, so that they stay securely in place.\u003C/p>\u003Ch3>2. Secure Handrails or Grab Bars\u003C/h3>\n\u003Cp>Drop-in anchors are commonly used to attach handrails or grab bars in areas like stairways, bathrooms, or outdoor steps to help ensure stability and safety.\u003C/p>\u003Ch3>3. Install Wall-Mounted TVs\u003C/h3>\n\u003Cp>For heavy flat-screen TVs, anchors can provide a secure mount to hold the weight and minimize the risk of the TV pulling free from the wall.\u003C/p>\u003Ch3>4. Hang Outdoor Fixtures\u003C/h3>\n\u003Cp>They're used to securely hang or mount outdoor fixtures such as lighting, signs, or decorative elements on exterior concrete walls or posts.\u003C/p>\u003Ch3>5. Attach Structural Supports\u003C/h3>\n\u003Cp>This includes the installation of supports for carports, pergolas, or decking, where a strong anchor is required to maintain structural integrity.\u003C/p>\u003Ch3>6. Secure Heavy Appliances and Furniture\u003C/h3>\n\u003Cp>To prevent tipping, heavy items like free-standing shelves, workbenches, or home gym equipment can be anchored to the concrete floor in garages or basements.\u003C/p>\u003Ch3>7. Install Garage Door Openers\u003C/h3>\n\u003Cp>Drop-in anchors are used to securely attach the bracketry of garage door openers to the concrete ceiling of garages.\u003C/p>\u003Ch3>8. Mount Electrical and Plumbing Fixtures\u003C/h3>\n\u003Cp>This includes securing conduit straps, junction boxes, and plumbing fixtures in utility areas.\u003C/p>\u003Ch2>Pre-Installation Considerations\u003C/h2>\u003Cfigure>\u003Cimg src=\"https://fsi.nyc3.cdn.digitaloceanspaces.com/blog/_transforms/_blogPost/3432/image2_2024-01-18-152557_aeaq.webp\" alt=\"Pre-Installation Considerations\" />\u003C/figure>\n\u003Cp>Before starting a home improvement project involving the installation of concrete drop-in anchors, you need to check a few things:\u003C/p>\u003Ch3>Concrete Condition\u003C/h3>\n\u003Cp>Make sure the concrete is solid and without cracks. It should be older than 30 days because fresh concrete might not hold the anchor well.\u003C/p>\u003Ch3>Anchor Size and Load\u003C/h3>\n\u003Cp>Pick the right anchor size for the job. Think about what you're attaching and how heavy it is. The anchor needs to be strong enough to hold it.\u003C/p>\u003Ch3>Depth and Edge Distance\u003C/h3>\n\u003Cp>Don't drill too close to the edge of the concrete; it could break. There should be enough room around the hole, and it needs to be deep enough for the anchor.\u003C/p>\u003Ch3>Anchor Material\u003C/h3>\n\u003Cp>If you're working somewhere with moisture (like a basement) or outside, use anchors that won't rust, such as stainless steel.\u003C/p>\u003Ch3>Clear the Area\u003C/h3>\n\u003Cp>Make sure pipes and wires aren't in the way where you're going to drill. You don't want to accidentally hit them.\u003C/p>\u003Ch2>Selecting Appropriate Equipment and Anchor Materials\u003C/h2>\n\u003Cp>The right tools and anchors are essential for a successful installation. Necessary tools include:\u003C/p>\u003Ch3>Drill\u003C/h3>\n\u003Cp>A hammer drill is typically used when drilling into concrete. It pounds the drill bit in and out while it is spinning, which pulverizes the concrete more effectively than a standard drill. It's essential to wear proper safety equipment, such as goggles and gloves, and to start the drill at a low speed to prevent the bit from wandering or breaking.\u003C/p>\u003Ch3>Drill Bits\u003C/h3>\u003Cfigure>\u003Cimg src=\"https://fsi.nyc3.cdn.digitaloceanspaces.com/blog/_transforms/_blogPost/3434/image1_2024-01-18-152748_mgnb.webp\" alt=\"Drill Bits\" />\u003C/figure>\n\u003Cp>For drilling into concrete, masonry drill bits are the go-to choice, characterized by their robust tungsten carbide tip and spiral design that facilitates the removal of drilling dust. SDS (Slotted Drive System) drill bits can also be used with a hammer drill to provide the impact necessary for penetrating dense, hard surfaces such as concrete.\u003C/p>\u003Ch3>Hammer\u003C/h3>\n\u003Cp>To ease anchor insertion.\u003C/p>\u003Ch3>Setting Tool\u003C/h3>\n\u003Cp>This is a critical piece of equipment used during the installation of drop-in anchors. It is designed to expand the anchor within the concrete to ensure a secure and proper fit. The tool is inserted into the anchor and struck with a hammer. This action forces the anchor to expand and grip the sides of the hole tightly, which creates a firm hold within the concrete. Always remember to use the correct size of the setting tool that corresponds to the diameter of your anchor in order to ensure an effective installation.\u003C/p>\u003Ch3>Properly Sized Anchor\u003C/h3>\n\u003Cp>The key to a successful installation is choosing an anchor of the appropriate size. This includes considering both the diameter and length of the anchor, relative to the thickness and type of material being anchored. A properly sized anchor will ensure a secure hold that allows the attached fixture to bear the expected load without causing damage to the concrete, or the fixture itself.\u003C/p>\u003Ch2>Prioritizing Safety During Concrete Anchor Installation\u003C/h2>\n\u003Cp>The gear listed below will help to speed up installation and increase safety:\u003C/p>\u003Ch3>Safety Gear\u003C/h3>\n\u003Cp>\u003Cstrong>Safety Glasses:\u003C/strong> Safety glasses are essential to protect your eyes from flying debris while drilling into concrete.\u003C/p>\n\u003Cp>\u003Cstrong>Hearing Protection:\u003C/strong> Drilling can be a noisy process, so it's crucial to protect your ears with appropriate earplugs or earmuffs.\u003C/p>\n\u003Cp>\u003Cstrong>Dust Mask:\u003C/strong> Wearing a mask can prevent you from inhaling the dust created during the drilling process.\u003C/p>\n\u003Cp>\u003Cstrong>Work Gloves: \u003C/strong>Thick, protective gloves can help to protect your hands from the vibration of the drill and prevent injury from sharp edges or hot surfaces.\u003C/p>\n\u003Cp>\u003Cstrong>Safety Boots:\u003C/strong>Safety boots will help protect your feet in case a heavy object is accidentally dropped.\u003C/p>\n\u003Cp>\u003Cstrong>Hard Hat:\u003C/strong> If you're working in an area where there's a chance of objects falling or bumping your head, it's important to wear a hard hat for your safety.\u003C/p>\u003Ch2>Step-by-Step Anchor Installation Instructions\u003C/h2>\n\u003Cp>There are different installation instructions for the different types of concrete anchors. The following are general guidelines. It is always best to follow the manufacturer’s instructions for proper use.\u003C/p>\u003Col>\u003Cli>\u003Cstrong>Mark the Position: \u003C/strong>Identify the exact location where the drop-in anchor will be installed on the concrete surface.\u003C/li>\u003Cli>\u003Cstrong>Drill the Hole:\u003C/strong> Using a hammer drill with the appropriate masonry bit, create a hole in the concrete at the marked position. The drilled hole should match the length and diameter of the anchor.\u003C/li>\u003Cli>\u003Cstrong>Clean the Hole: \u003C/strong>Remove any debris or dust from the hole using a brush or vacuum. Proper cleaning ensures a tight fit for the anchor.\u003C/li>\u003Cli>\u003Cstrong>Insert the Anchor:\u003C/strong> Place the anchor into the hole with the threaded part sticking upwards. Make sure the top of the anchor aligns with the surface of the concrete.\u003C/li>\u003Cli>\u003Cstrong>Set the Anchor: \u003C/strong>Use a setting tool to secure the anchor. The setting tool is driven into the anchor to expand it against the sides of the hole.\u003C/li>\u003Cli>\u003Cstrong>Inspect the Anchor:\u003C/strong> Confirm that the anchor is secure and flush with the concrete surface. The anchor should not move when force is applied.\u003C/li>\u003Cli>\u003Cstrong>Prepare the Fixture: \u003C/strong>Align the fixture with the anchor before inserting the bolt or threaded rod.\u003C/li>\u003Cli>\u003Cstrong>Insert the Bolt or Threaded Rod: \u003C/strong>Place the bolt or threaded rod into the anchor and ensure that it fits snugly.\u003C/li>\u003Cli>\u003Cstrong>Tighten the Bolt or Rod: \u003C/strong>Using a wrench, tighten the bolt or rod into the anchor until it is secure.\u003C/li>\u003Cli>\u003Cstrong>Final Inspection:\u003C/strong> Verify the fixture is stable and securely attached to the concrete surface. Correct any issues if necessary.\u003C/li>\u003C/ol>\u003Ch2>Order Your Concrete Anchors from Fastener Systems Inc.\u003C/h2>\n\u003Cp>\u003Ca href=\"https://www.fastenersystems.com/\">Fastener Systems Inc. \u003C/a>is your go-to source for reliable concrete \u003Ca href=\"https://www.fastenersystems.com/products/drop-in-anchors\">drop-in anchors\u003C/a> that provide the sturdy support you need. Don't compromise on the stability of your installations—choose our trusted anchors for a job well done.\u003C/p>\n\u003Cp>\u003Ca href=\"https://www.fastenersystems.com/contact\">Contact us today\u003C/a> for more information on all of our \u003Ca href=\"https://www.fastenersystems.com/tools-and-products\">products\u003C/a>!\u003C/p>","https://fsi.nyc3.cdn.digitaloceanspaces.com/blog/_transforms/_1000x750_crop_center-center_80_none/3431/image3.webp",[272],{"__typename":158,"id":159,"title":43,"slug":160,"uri":161},{"id":274,"status":148,"title":275,"slug":276,"uri":277,"postDate":267,"dateUpdated":246,"excerptText":278,"blogPostContent":279,"blogFeaturedImageUrl":259,"blogCategories":280},"2903","Understanding Painted Stainless Steel Screws","painted-stainless-steel-screws","blog/painted-stainless-steel-screws","Understanding the use and benefits of painted stainless steel screws is key for any construction task. Learn about their manufacturing, painting process, and why professional painting ensures durability and a perfect aesthetic match for your projects.","\u003Cp>Whether you're working on a DIY project or a professional construction job, the choice of hardware can often be as crucial as the task itself. Painted stainless steel screws offer a unique blend of aesthetics and functionality, and they provide not just strength and durability, but also the ability to blend seamlessly with the design of your project. In this article, we explore painted stainless steel screws, their applications, and the benefits of purchasing them professionally painted.\u003C/p>\n\u003Ch2>What Are Stainless Steel Screws?\u003C/h2>\n\u003Cp>Stainless steel screws are high-strength, corrosion-resistant fasteners commonly used in various industries such as automotive, electronic, medical, marine, and construction. They are designed to work with a wide variety of different surfaces, and the selection of the right screw can be crucial for the success of a project.\u003C/p>\n\u003Ch2>How Are Stainless Steel Screws Made?\u003C/h2>\n\u003Ch3>Material Selection\u003C/h3>\n\u003Cp>Stainless steel screws are made from iron-based metals that contain at least 10% chromium, as well as other metals that provide corrosion and heat resistance. These types of screws belong to the B8 class of stainless steel alloys and do not require a protective coating.\u003C/p>\n\u003Ch3>Manufacturing Process\u003C/h3>\n\u003Cp>There are two main methods for manufacturing stainless steel screws:\u003C/p>\n\u003Cp>\u003Cstrong>Machining\u003C/strong> - This approach is well-suited for bigger fasteners in smaller production batches. Nevertheless, it could lead to a weaker product with reduced fatigue resistance.\u003C/p>\n\u003Cp>\u003Cstrong>Cold Heading\u003C/strong> - Involves shaping stainless steel wire by passing it through die and punch cavities. This faster and more efficient method requires fewer steps. Cold forming is also used for threading screws after machining or cold-working them.\u003C/p>\n\u003Ch3>Hardening Process\u003C/h3>\n\u003Cp>Stainless steel screws often undergo a specific process that combines low-temperature aging treatments and cold working. This increases their strength and durability, depending on their application. For instance, automotive stainless steel fasteners are typically stronger than those used in commercial appliances such as floor buffers or ovens.\u003C/p>\n\u003Ch2>The Process of Painting Stainless Steel Screws\u003C/h2>\n\u003Cp>The process of painting stainless steel screws for commercial distribution is a specialized task that requires specific procedures and adherence to certain standards. \u003C/p>\n\u003Cp>Here's a practical breakdown of the process:\u003C/p>\n\u003Col>\u003Cli>Preparation and Cleaning: The screws may be prepared using techniques like sandblasting, liquid honing, or flame polishing. Any existing paint can be removed with fully automatic strip-off procedures that include blast cleaning or burn-off for industrial products.\u003C/li>\u003Cli>Application of Coatings: Different painting options are available including epoxies, polyurethanes, acrylics, alkyds, lacquers, urethane enamels, and other specialty coatings. In some instances, coatings are applied through powder coating or custom spray painting methods. Spin dip coatings may also be used. The coatings must meet specific industry standards like ASTM and can be tailored to provide corrosion resistance, scratch and weather resistance, and specific finishes such as gloss or matte.\u003C/li>\u003Cli>Special Treatments: In addition to painting, other services like corrosion-resistant black oxide coating, custom masking, and application of stenciling and stickers can be performed. This may include the assembly of screws with bonded sealing washers like EPDM. Fasteners may also be painted with two-part polyurethane and waterborne paints, so that multiple sizes and colors can be painted simultaneously.\u003C/li>\u003Cli>Quality Control and Certification: Many painting services adhere to specific military and industrial specifications to help ensure that the quality is maintained across various industries such as aerospace, automotive, electrical, and construction. Some providers even offer color certification to ensure the color matches the required standards.\u003C/li>\u003Cli>Packaging and Distribution: Once painted, the screws may be sorted and packaged in single locations. Services may include special packaging, labeling, warehousing, and drop shipping to cater to various market needs.\u003C/li>\u003C/ol>\n\u003Cp>Overall, commercial painting of stainless steel screws involves a multifaceted process that encompasses everything from the selection of the right materials and coatings to specialized treatments, and quality control.\u003C/p>\n\u003Ch2>Applications Where Painted Stainless Steel Screws Would Be Desired\u003C/h2>\n\u003Ch3>Aesthetic Purposes\u003C/h3>\n\u003Cp>In applications where the appearance of the screw matters, like in custom carpentry or decorative installations, painted screws can provide a matching or contrasting color to the surrounding materials.\u003C/p>\n\u003Ch3>Specific Industry Requirements\u003C/h3>\n\u003Cp>Certain industries may require color-coding for screws to indicate different properties or purposes.\u003C/p>\n\u003Ch3>Corrosion Resistance\u003C/h3>\n\u003Cp>The painted finish may provide additional protection in environments where extra resistance to weathering is needed.\u003C/p>\n\u003Ch2>Why Not Paint Stainless Steel Screws Yourself?\u003C/h2>\n\u003Cp>Stainless steel is a complex material, and painting it requires specialized knowledge, equipment, and materials. Applying paint to stainless steel screws by yourself can lead to improper adherence, uneven finishing, or reduced corrosion resistance. It is a process best left to the professionals who have the equipment and expertise to ensure the paint is applied correctly. The following issues explain why it is not a DIY project:\u003C/p>\n\u003Ch3>Chromium Oxide Passive Film\u003C/h3>\n\u003Cp>Stainless steel has a chromium oxide passive film that protects against corrosion. The film requires oxygen to repair itself, and painting can inhibit this process if not done properly. If the steel doesn't \"breathe,\" its lifespan could be significantly reduced.\u003C/p>\n\u003Ch3>Complex Preparation Process\u003C/h3>\n\u003Cp>The process of painting stainless steel requires meticulous preparation. The surface must be prepared using abrasive blasting or light hand abrasion, followed by thorough cleaning to remove any dust, oil, or grease. Any misstep in this preparation can have negative consequences for the integrity of the stainless steel.\u003C/p>\n\u003Ch3>Specialized Coatings\u003C/h3>\n\u003Cp>When painting stainless steel, you must use an epoxy and a primer coating specifically designed for stainless steel. Applying the correct combination of coatings is essential, and any deviation can lead to problems with the hardware.\u003C/p>\n\u003Ch3>Potential Safety Concerns\u003C/h3>\n\u003Cp>In cases like marine stainless steel nuts and screws, incorrect painting can lead to hardware damage, and can possibly impact basic safety. For marine applications, this can be a critical issue.\u003C/p>\n\u003Ch3>Experience Required\u003C/h3>\n\u003Cp>Properly painting stainless steel is described as an \"extremely involved process.\" It requires specific knowledge and skills, and if not done correctly, it will reduce the life of the stainless steel. Professionals with experience in marine-grade hardware may be better suited to handle this task.\u003C/p>\n\u003Ch2>Discover the Perfect Blend of Durability and Aesthetics with Painted Stainless Steel Screws from Fastener Systems Inc.\u003C/h2>\n\u003Cp>Explore Fastener Systems Inc. range of fasteners and discover the perfect solutions for your construction and industry needs. From roofing to drywall, and from wood to metal applications, our extensive product line of fasteners is sure to meet your needs. \u003C/p>\n\u003Cp>Contact us today for more information and receive a free quote!\u003C/p>",[281],{"__typename":158,"id":159,"title":43,"slug":160,"uri":161},{"copyrightText":283,"socialLinks":284},"© 2023 Fastener Systems. All Rights Reserved.",[285,289,293,297],{"socialNetwork":286,"profileUrl":287,"accountNameOrId":31,"iconUrl":288},"Facebook","https://www.facebook.com/FastenerSystemsInc/","https://fsi.nyc3.cdn.digitaloceanspaces.com/media/social-icons/facebook.svg",{"socialNetwork":290,"profileUrl":291,"accountNameOrId":31,"iconUrl":292},"Instagram","https://www.instagram.com/fastenersystemsinc/?next=%2Fidhaac%2Ftagged%2F&hl=af","https://fsi.nyc3.cdn.digitaloceanspaces.com/media/social-icons/instagram.svg",{"socialNetwork":294,"profileUrl":295,"accountNameOrId":31,"iconUrl":296},"LinkedIn","https://www.linkedin.com/company/fastener-systems-inc","https://fsi.nyc3.cdn.digitaloceanspaces.com/media/social-icons/FSILinkedIn.svg",{"socialNetwork":298,"profileUrl":299,"accountNameOrId":31,"iconUrl":300},"YouTube","https://www.youtube.com/@FastenerSystemsInc","https://fsi.nyc3.cdn.digitaloceanspaces.com/media/social-icons/FSIYoutube.svg",["Reactive",302],{"$ssite-config":303},{"_priority":304,"env":308,"name":309,"url":310},{"name":305,"env":306,"url":307},-5,-15,-4,"production","fasteners-systems","https://www.fastenersystems.com/",["Set"],["ShallowReactive",313],{"theHeader_mainMenuNodes":-1,"blogIndex_blogCategory_fasteners_category":-1,"ctas_data":-1,"$67d5JuJUMA":-1,"$nW0gVRoLGI":-1,"blogIndex_blogPosts_1_12":-1,"theHeader_siteHeader":-1,"$TlXm8pMkVZ":-1},true,"/blog/category/fasteners",{}]